![brioHR-logo-color.svg]](https://support.briohr.com/hubfs/brioHR-logo-color.svg)
Audience & Scope
Audience: HR Admin
Module: Payroll
Country: Global
Pre-requisites: Access to HR Lounge Payroll module
To download the GL Report, you first need to enable it. Please follow the steps below:
1. In HR Lounge, click into the Payroll module.
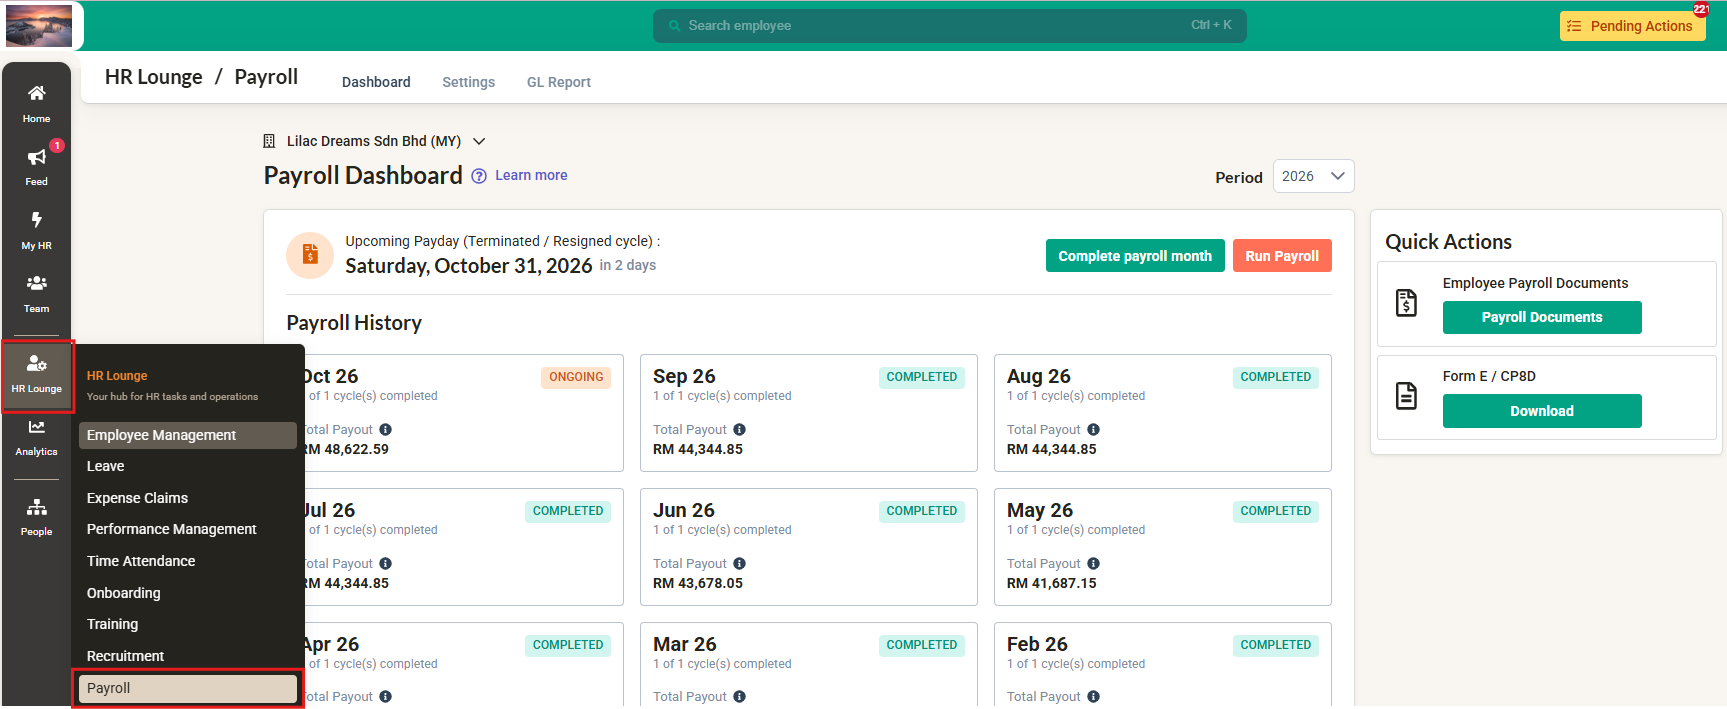
2. In the Payroll dashboard, click on GL Report.
3. Click on the Enable icon.
Enabling GL reports allows you to download an accounting report that can be used by your finance department. You will need to enter your list of accounts and map each payroll item to the appropriate account.

4. Configure your accounts before proceeding with the mapping. Use the List of Accounts button on the top right of the page to do this.
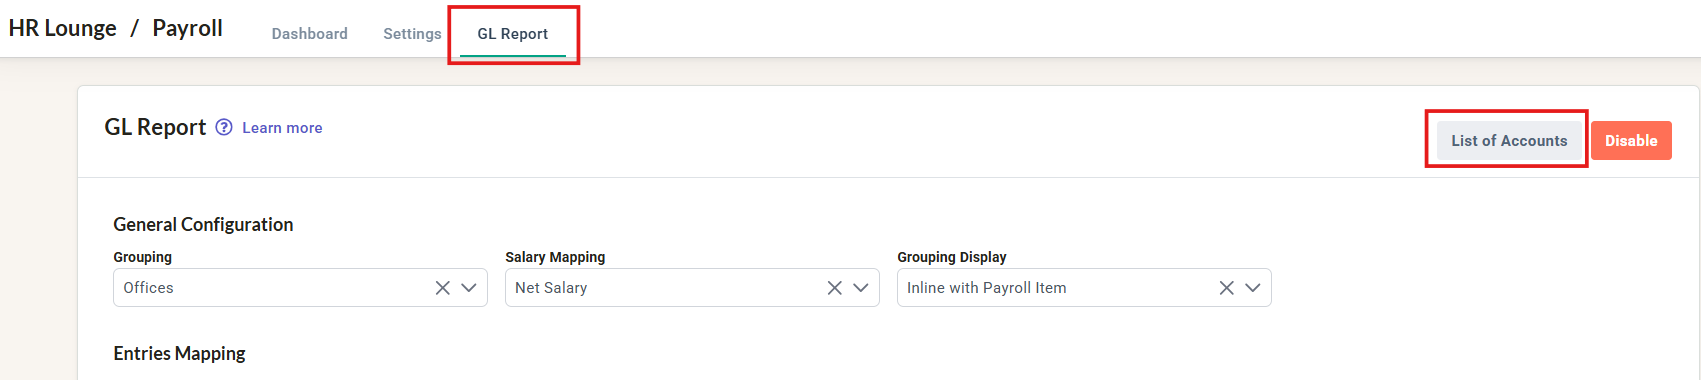
i. To add an account, click on the +Add an account icon.

ii. Select the Type, and input the Account Number and Description.
NOTE:
The Account Number is typically a code for the items set up. It's best practice to consult with your Finance team to ensure the correct Account Numbers are used.
iii. Click on the tick icon to save the information.

5. Perform the General Configuration by selecting the Grouping from the dropdown menu, as well as the Salary Mapping.
For more information on ENTRIES MAPPING, read below:
The first thing to do is choose:
1. Your Grouping:
a. Choose Company if you want your payroll accounting entries to be grouped at the company level.
b. Choose Office if you prefer them to be grouped at the office level.
c. Choose Department if you want the entries to be grouped at the department level.
Most companies will use the Company setting. However, you can select Office or Department if you have departments, branches, or outlets that you want to distinguish in your accounting.
2. Your Salary Mapping:
a. Choose Basic Salary if you want to map your employees' basic salary first. This option allows you to separate expenses like allowances into different accounts.
b. Choose Net Salary if you prefer to map your employees' net salary first. Refer to the MAPPING EXAMPLE below to understand the impact.
After making these selections, you can perform your Entries Mapping. For each element in the list, choose the corresponding debit and credit account. This should align with your accounting preferences.

WARNING:
If you are using the Basic Salary mode, it's mandatory to map all payroll items you use in your payroll other than basic salary and statutory contributions. This includes any allowances, bonuses, deductions, unpaid leave, etc. Use the Add payroll item button for this purpose.
Mapping Example:
Many of our clients use a mapping similar to the one described below. The goal is to break down expenses between the basic salary and other items, such as allowances paid to employees. Simultaneously, you may want to group your liabilities to employees and statutory bodies.

If you want to use such a mapping, here's how it works in BrioHR:

When you have completed your configuration, don’t forget to save the information by clicking on the Save icon at the bottom right.
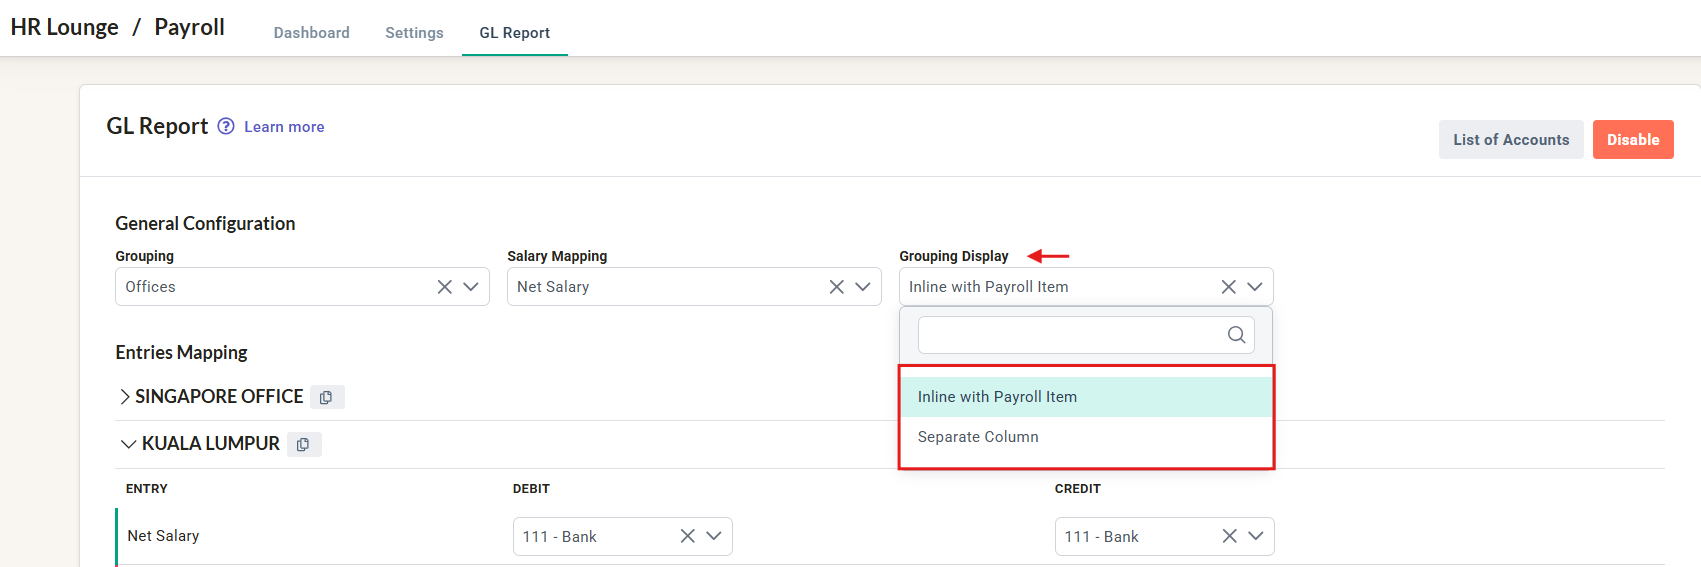
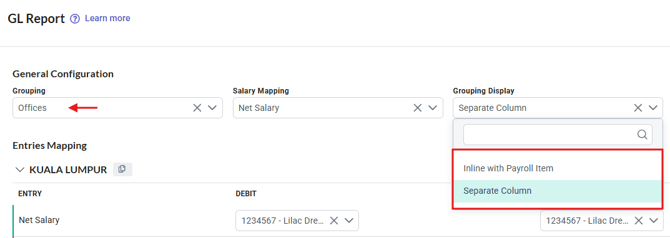
6. Select the Grouping Display. Choose to have the Grouping displayed Inline with Payroll Item or in a Separate Column.
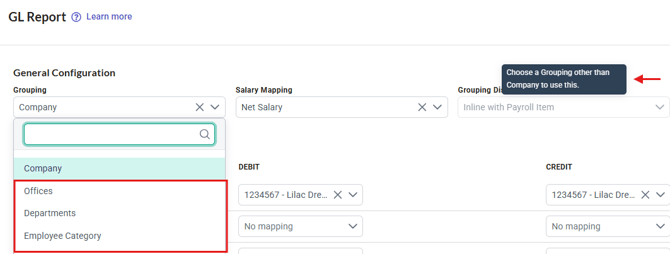
IMPORTANT:
- Choose a Grouping other than Company to use the Grouping Display feature, such as Offices, Departments etc.
-
Inline with Payroll Item: Displays the grouping in parentheses next to the Payroll Item name, following the existing format.
-
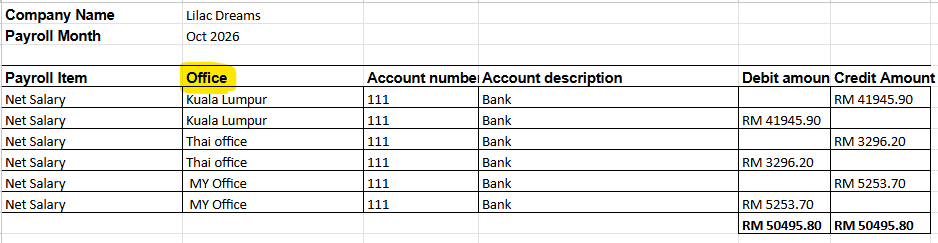
Separate Column: Displays the grouping in its own column, with a column header that dynamically reflects the active grouping type (e.g. Department, Office, or Cost Center).
-
No Changes to Existing Configurations: Existing configurations default to Inline with Payroll Item, so current GL Report exports remain unchanged unless you update the setting.
-
GL Report Only: This enhancement applies exclusively to GL Reports and does not affect Xero or Sage exports.
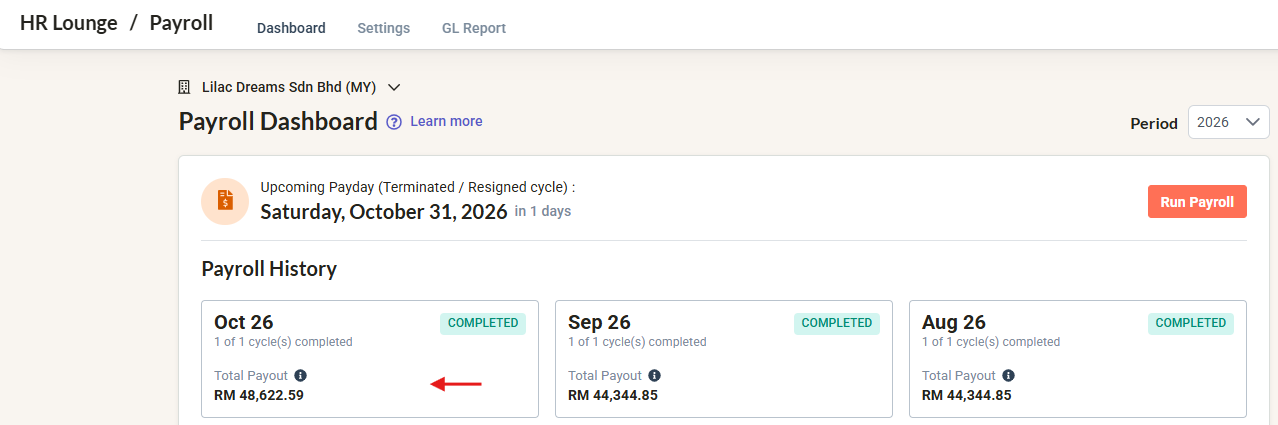
7. Once the configuration is set up and saved, go back into the Payroll dashboard
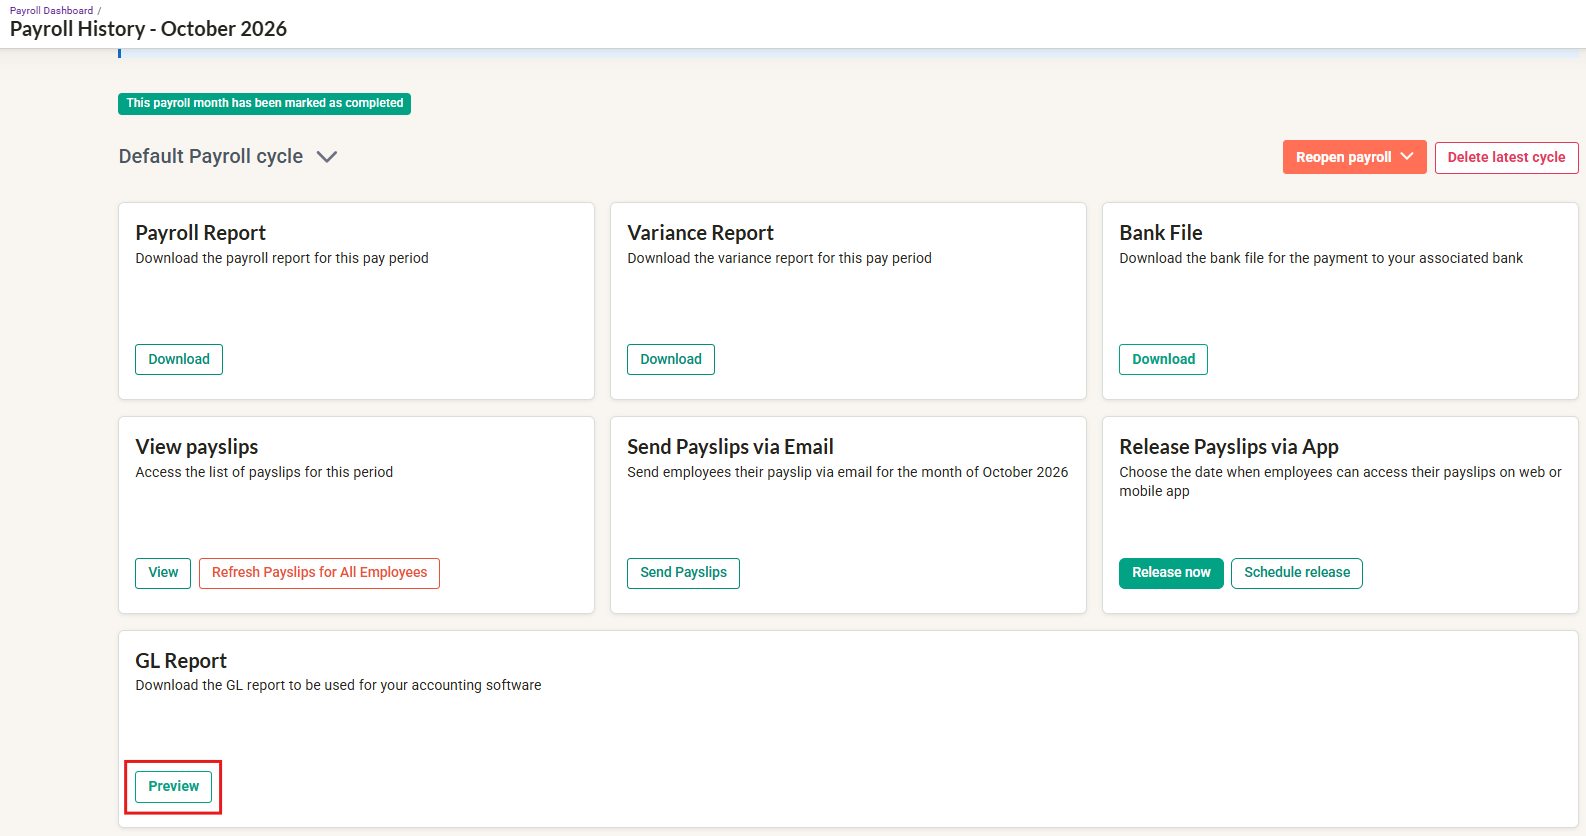
8. Click into the completed payroll month, and click on the Preview icon to download the GL Report Excel file.
Here are examples on how the GL Report excel will appear:
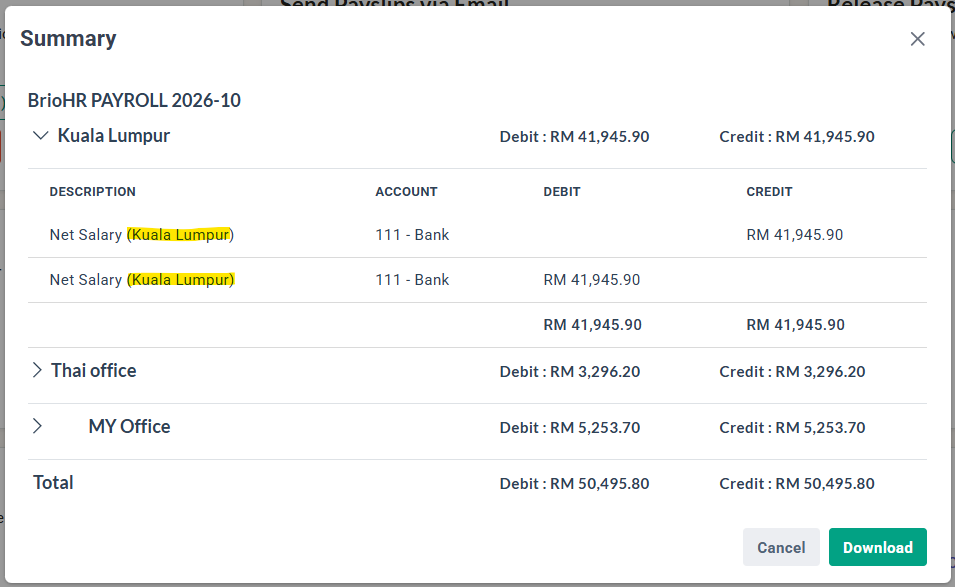
a) Grouping display chosen - Inline with Payroll Item
Example in GL Report preview:
Example in Excel Report generated: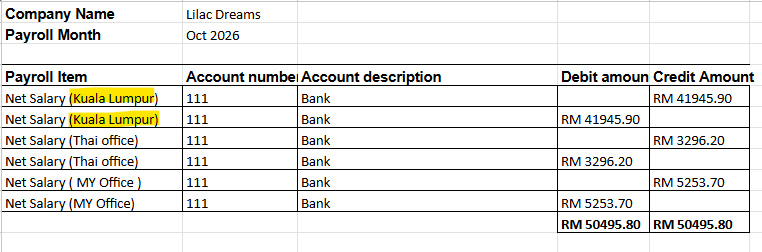
b) Grouping display chosen - Separate Column
Example in GL Report preview:
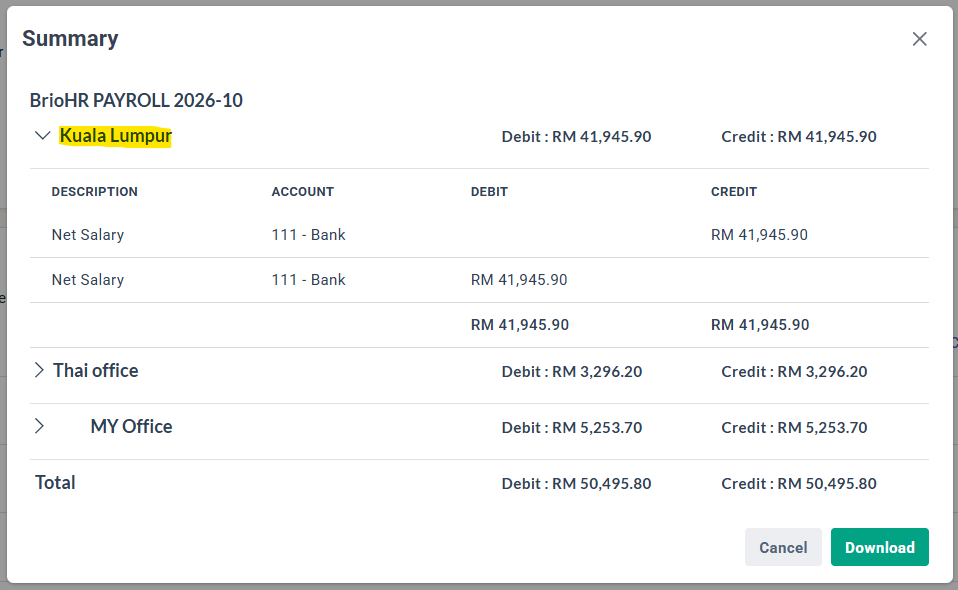
Example in Excel Report generated:
Last Updated
By: Arveena