![brioHR-logo-color.svg]](https://support.briohr.com/hubfs/brioHR-logo-color.svg)
Audience & Scope
Audience: HR and admin teams setting up brioHR for the first time
Module: Expense Claims
Country: Malaysia, Singapore
Pre-requisites: Implementation kick-off meeting with your Implementation Manager (IM) completed; Expense Claims data migrated by your IM
This article is part of the Expense Claims data verification series. It follows the Expense Claims Data Verification Guide (PDF).
Walk through your claim journeys
Here you'll walk through the claims your employees will make, using the settings you've already checked, to confirm each one would reach the right approvers and stay within the right limits. Then you'll keep an eye on the first real claims after go-live.
⚠ Important: don't create claims to test your setup
Claims can't be deleted in brioHR, only cancelled, and every claim that is created stays in the system and shows up in your reports. Check your setup by looking at the settings and reports below, not by submitting claims.
Walk through each claim journey
Steps 1 to 6 checked each setting on its own. Here you follow a whole claim through them: for each situation below that applies to you, work out what should happen using your template, then check the settings in brioHR that decide it. Pick a real employee for each one, so you can follow their policy, office and manager.
| Situation | Where to check | What should be true |
|---|---|---|
| A claim in each claim group, and a non-grouped claim | The employee's policy > Approval, then the workflow itself | The workflow lists the right approvers, in the right order, and each one (manager, head of org unit, Claim Assignee or named employee) is the person you expect and is still with the company. |
| A claim report below and one above each approval threshold | The workflow's threshold settings | The threshold type, amount and offices match your template, and the employee's office is one of the offices listed. |
| Two claim types usually claimed together | Claim Groups | Both are in the same group, so they can go in one report. |
| A claim paid through payroll | The claim type's Payroll Connection, and the general payroll connection | It is paid under the pay item Finance expects. |
Watch your first real claims after go-live
Once employees start submitting real claims, use the first claims cycle as your final check:
- On the Claim Request page, open a few of the first claim reports from different claim groups, offices, and policies. Check that each report's approval history shows it went to the approvers you expect.
- Check that reports above an approval threshold include that approver, and reports below it do not.
- Check the employee's balance in the Expense Claim Balances report has gone down by the claim amount.
- Before your first Send to Payroll, use the period filter so that only new claims are selected (see Step 6).
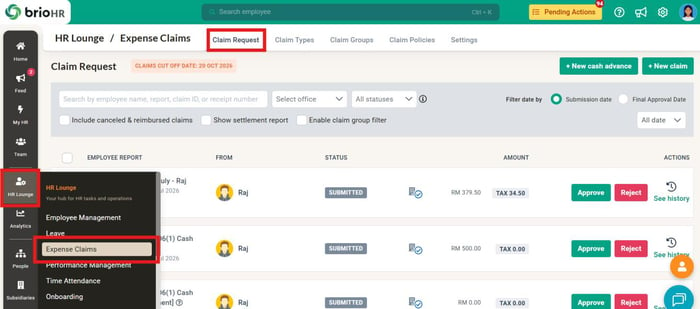
Click into HR Lounge > Expense Claims > Claim Request
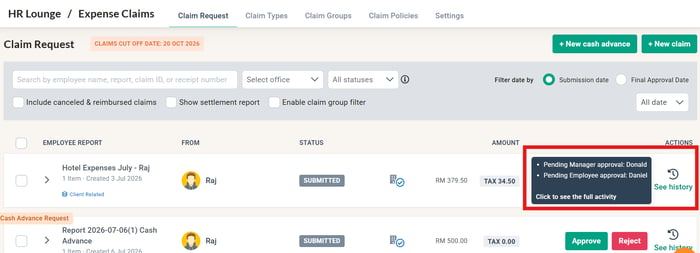
If a setting doesn't match what should happen, or a real claim goes somewhere you didn't expect, note the employee, the claim report and what you expected, and raise it with your IM straight away.
⚠ Out of scope
This guide checks that brioHR matches the setup you submitted in your template. Deciding your company's claim rules, such as who is entitled to what and how much, is your company's decision. If you want to change a rule, tell your IM.
🔗 Related articles
← Previous: How to Check Expense Claims Data for a Large Headcount
Next: If Your Expense Claims Data Doesn't Match, and How to Sign Off for Go-Live →
Back to Expense Claims Data Migration and Verification: Start Here
Ownership
By: Aqilah