![brioHR-logo-color.svg]](https://support.briohr.com/hubfs/brioHR-logo-color.svg)
A. Accessing The Modules
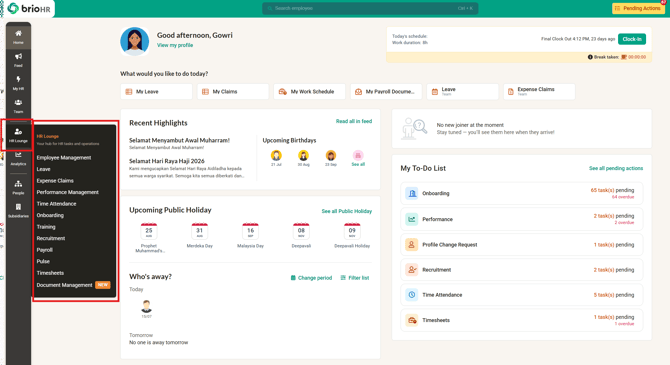
To access the following modules, click on the respective icons on the left panel of your HR Lounge dashboard. You will then be navigated to the individual modules where you can review information and perform further actions.
- Employee Management
- Leave Module
- Expense Claims Module
- Payroll Module
- Performance Module
- Pulse Module
- Onboarding Module
- Recruitment Module
- Time Attendance Module
- Training Module
- Timesheets Module
- Document Management
NOTE:
Access to each of these modules in the HR Lounge depends on the user's permission settings. If you are unable to view/access a specific module, the account Admin should check the user's permission settings by going to: Settings > User Groups > Edit > HR Modules Permission > Enable/Disable your preferred settings > Save.
B. Adding A New Employee in Employee Management
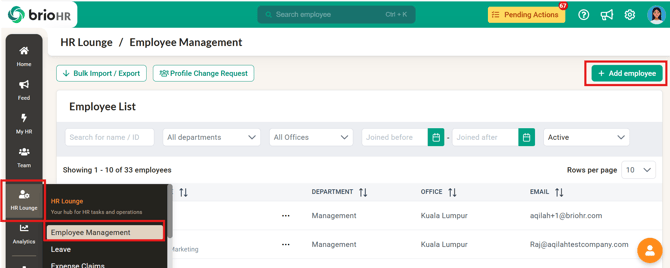
In HR Lounge > Employee Management, click on the +Add Employee icon and fill in the employee information in the Add New Joiner pop-up window. Click Submit to complete the action and add the new employee.

C. Importing & Exporting Employee Information (In Bulk)
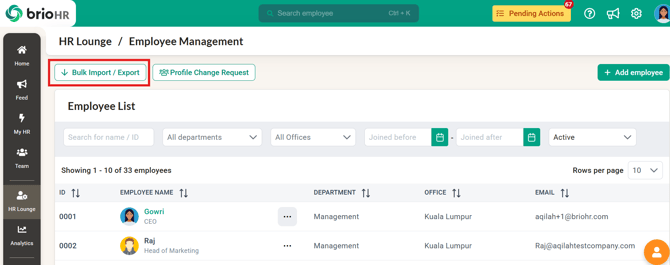
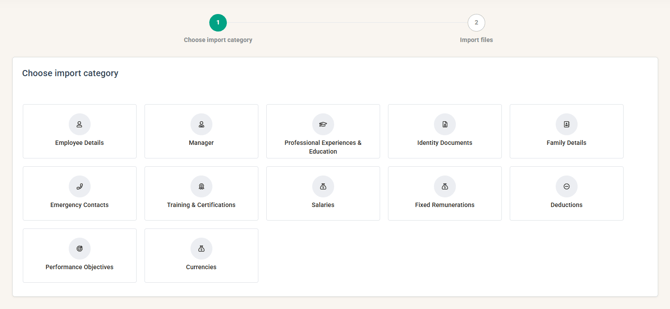
ClickIn HR Lounge > Employee Management, click on the Bulk Import/Export icon to import or export employee information such as:
- Employee Details - for updating profiles in bulk or creating bulk employee accounts
- Manager
- Professional Experiences & Education
- Identity Documents
- Family Details
- Emergency Contacts
- Training & Certifications
- Salaries
- Fixed Remunerations
- Deductions
- Performance Objectives
- Currencies
NOTE:
The bulk Import/Export does not handle payroll center reassignment. Refer to the article here for more info.
D. Downloading Reports (in Report Builder)
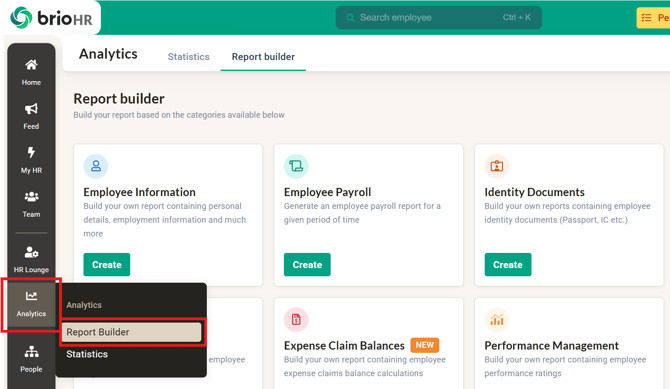
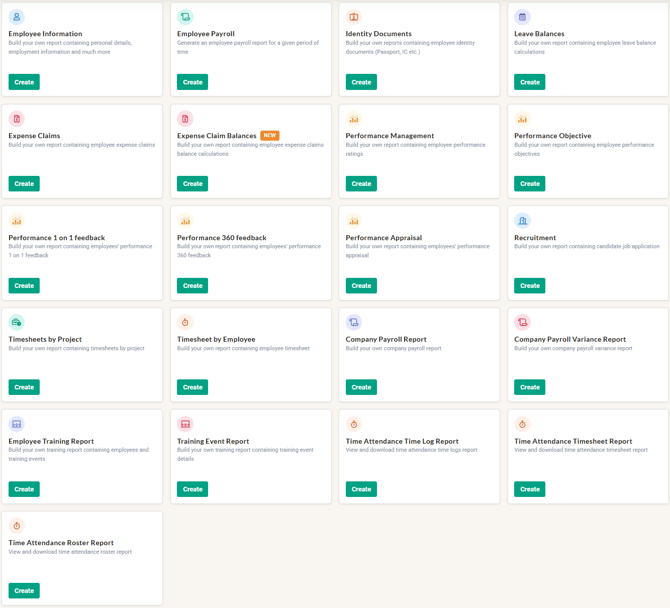
Go to Analytics and click Report Builder. You can select and build your report based on the categories available below:
- Employee Information Report
- Employee Payroll Report
- Identity Documents Report
- Leave Balances Report
- Expense Claims Report
- Expense Claim Balances Report
- Performance Management Report
- Performance Objectives Report
- Performance 1-on-1 Feedback Report
- Performance 360 Feedback Report
- Performance Appraisal Report
- Recruitment Report
- Timesheets by Project Report
- Timesheets by Employee Report
- Company Payroll Report
- Company Payroll Variance Report
- Employee Training Report
- Training Event Report
- Time Attendance Time Log Report
- Time Attendance Timesheet Report
- Time Attendance Roster Report
NOTE:
Access to each of these reports in the HR Lounge depends on the user's permission settings. If you are unable to view/access a specific report, the account Admin should check the user's permission settings by going to: Settings > User Groups > Edit > HR Modules Permission > Reports Module > Select/Unselect > Save.
E. Employee List (in Employee Management)
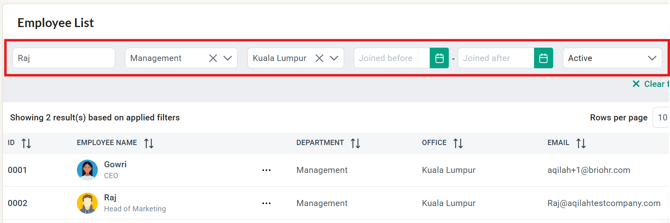
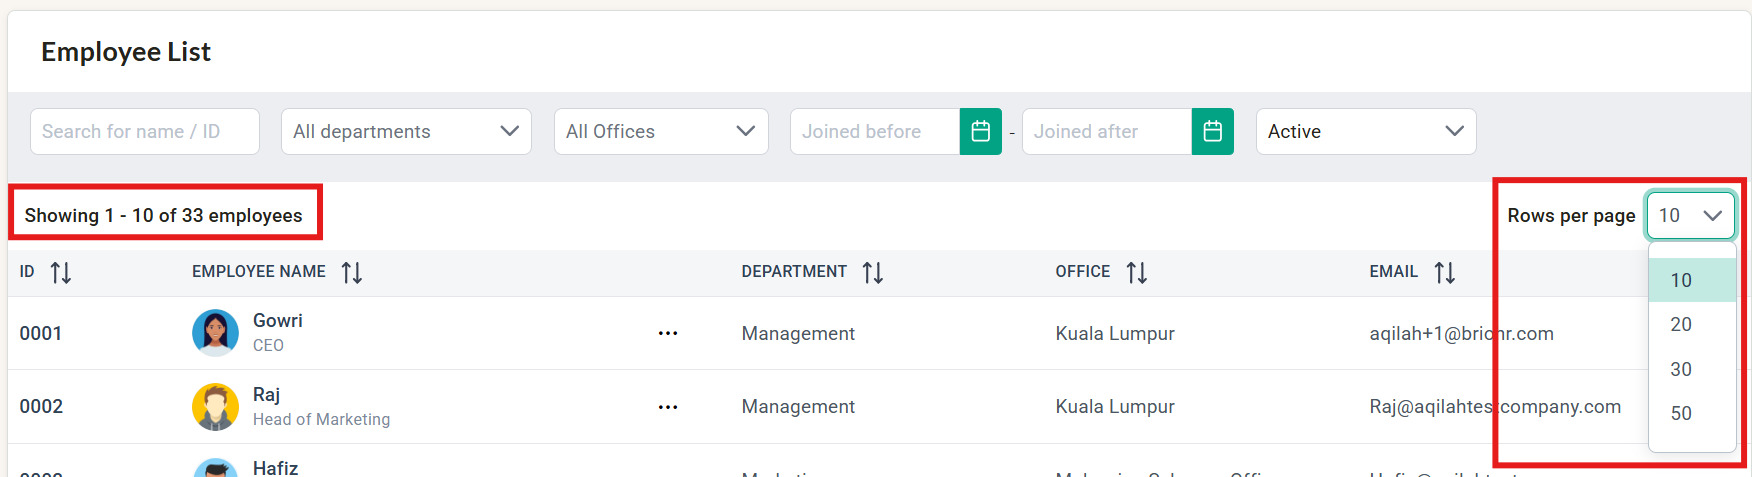
i. Search for employees by selecting filters such as:
a. Name/ID of employees
b. Departments
c. Offices
d. Joined date
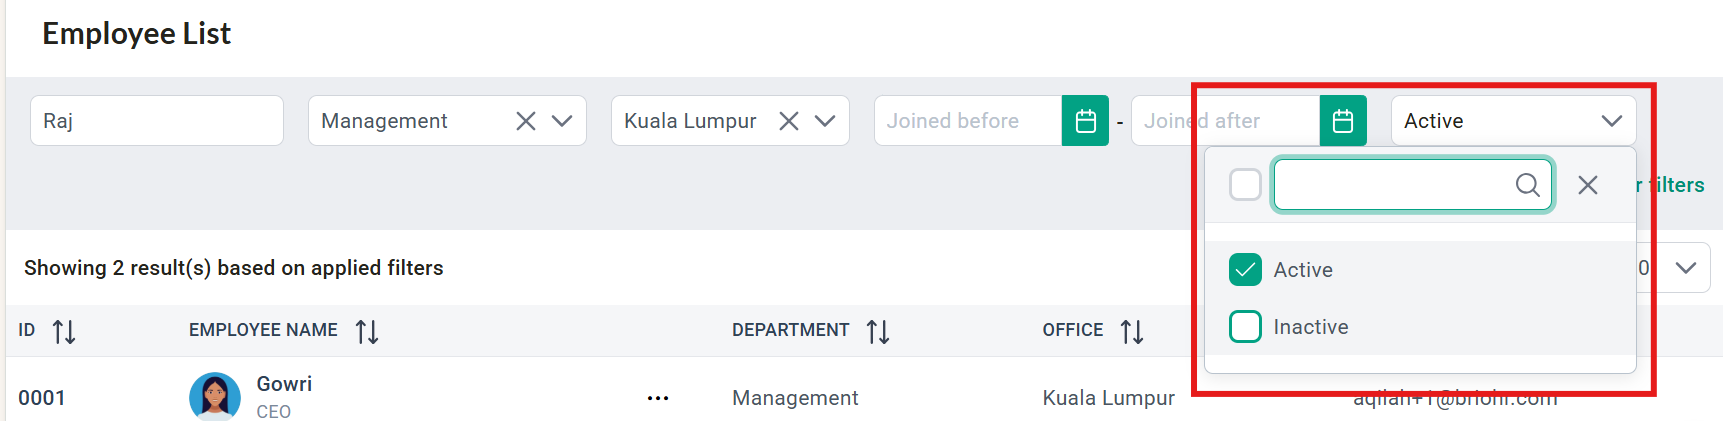
ii. Search for inactive employees by ticking the "Include inactive employees" checkbox.
NOTE:
By default, only active employees will be displayed in the Employee List.
iii. Determine the number of employees to be shown in the Employee List by clicking on the "Rows per page" dropdown menu. You can select up to 50 rows per page.
iv. Copy an employee's email address by hovering your mouse over the email address ("EMAIL" column), then click to copy the information.

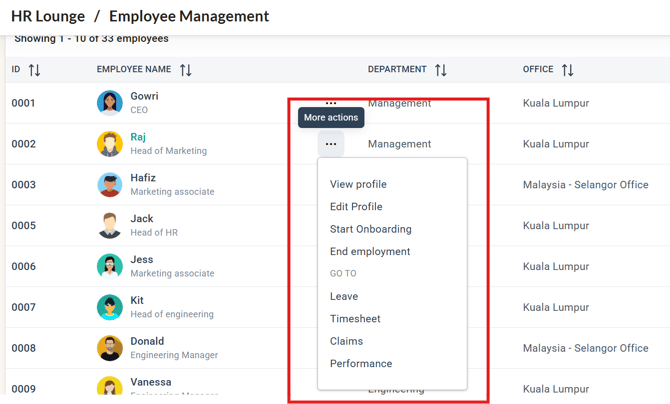
v. Hover your mouse over the "..." (More actions) icon for quick actions such as:
a. View the employee's Profile
b. Edit the employee's Profile
c. Start Onboarding for the employee
d. Select the employee's End Employment Date
e. View the employee's Leave dashboard
f. View the employee's latest Timesheet
g. View the employee's claim submissions
h. View the employee's latest Performance Cycle
NOTE:
Access to these quick actions will depend on each employee's user permission settings for each module. For example, if "Timesheets" is not enabled for an employee, the "Timesheet" option will be greyed out in the dropdown menu.
Need Assistance?
If you have any questions or require assistance, please reach out to our support team via live chat or email us at support@briohr.com.