![brioHR-logo-color.svg]](https://support.briohr.com/hubfs/brioHR-logo-color.svg)
This article covers everything done on the device itself: installing it, connecting it to the internet, registering the System Admin and setting up clocking. It's part 3 of 5 in the TC10 setup series.
Watch: Set up your TimeTec TC10 device
Step 1: Install the hardware
Mount the TC10 where every employee passes, such as the main entrance, and power it on. Keep it powered on and connected 24/7. For mounting, wiring and power details, see the BrioHR - TC10 - Basic Installation Guide (PDF).
Step 2: Connect the device to the internet
Using a LAN cable (recommended)
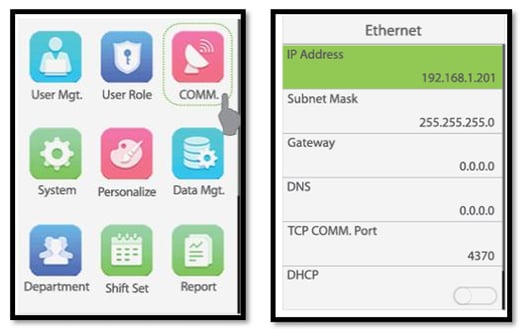
- On the device, go to Menu > COMM. > Ethernet.
- Turn on DHCP.
- Only if your network doesn't support DHCP, enter the IP address, subnet mask, gateway and DNS manually.
Using WiFi
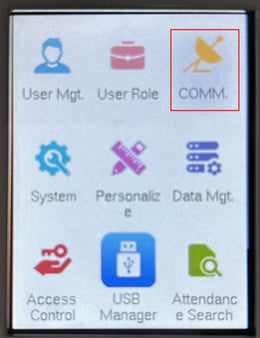
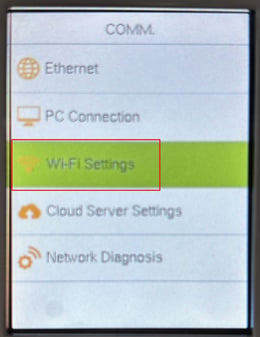
- On the device, go to Menu > COMM. > WiFi.
- Select a 2.4 GHz network. The TC10 can't connect to 5 GHz. If your router shows two names (e.g. "Office" and "Office_5G"), choose the 2.4 GHz one.
- Enter the password and confirm the WiFi shows as connected.
Typing letters in the WiFi password
The keypad types numbers by default. Press the right arrow button, choose the letter option, then press a number key repeatedly until the letter appears, like texting on an old phone (press 2 once for a, twice for b). Switch back the same way for numbers. To delete a character, press the left arrow button to backspace.
Make sure your network or firewall allows access to sg-push.zkclouds.com.
Step 3: Set the Cloud Server
Some devices arrive with this already set. Check it on every device.
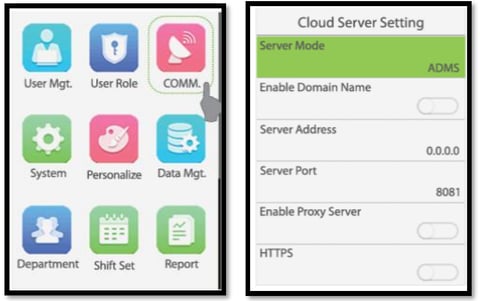
- Go to Menu > COMM. > Cloud Server Setting.
- Turn on Enable Domain Name.
- In Server Address, enter exactly https://sg-push.zkclouds.com, including https://.
- Wait about 5 minutes. If the device is still offline, disconnect and reconnect the WiFi or LAN cable.
Step 4: Check the connection
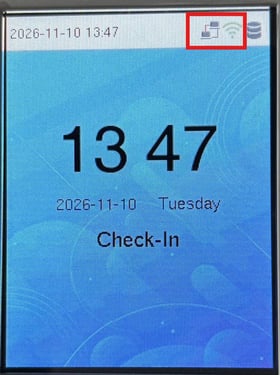
On the main screen, check the icons at the top right. Once the device is linked in BrioHR, a green dot next to it in the Device Integration Log also means it's online.
| What you see | What to do |
|---|---|
| Network icon green, cloud icon with no red dot | The device is online. Continue to Step 5. |
| Network icon with a red cross | Check the cable, or the WiFi password and signal. Make sure the WiFi is 2.4 GHz. |
| Cloud icon with a red dot | Check the server address (including https://), your firewall and internet access. Wait 5 minutes and reconnect. |
Step 5: Check the employee sync
Once the device is online, BrioHR sends each employee's Employee ID, first name and last name to it. New employees usually appear within 5–10 minutes while the device is online. To sync again, click Sync Employees in the Device Integration Log.
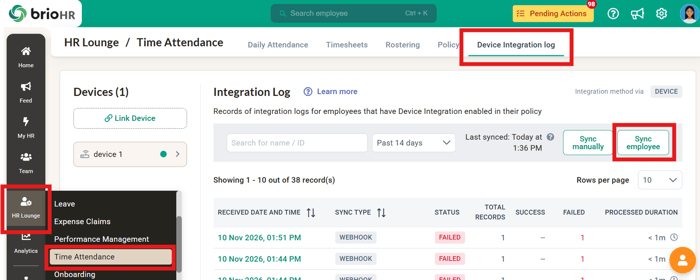
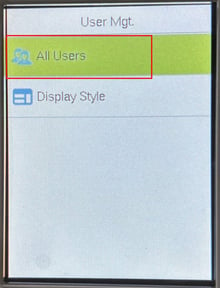
To check on the device, open Menu > User Mgt. > All Users.
| Situation | What happens on the device |
|---|---|
| New joiner in a selected office or department | Added automatically. |
| Employee moves office or department | Removed from devices they matched only through the old assignment. |
| Employee resigns or becomes inactive | Removed from all devices. Individually picked employees who become active again must be re-added. |
| Employee ID has hyphens, spaces or other special characters | Not synced, even if the sync shows as successful. Change the ID to letters and numbers only. |
| Employee ID changed in BrioHR | A new profile is added with the new ID. The employee must enroll again. |
| Device already has 800 employees | Extra employees aren't synced, and no error is shown. Check the count on the device card. |
Caution: Removing an employee from a device also deletes their face and fingerprint on it. If they're added back, they must enroll again.
Step 6: Make an employee the device System Admin
Make the person who will manage the device (for example, an HR Admin) a Super Admin, so only authorised people can change the device settings. They must already be on the device from the BrioHR sync (Step 5).
Watch: Make a user the device System Admin
- Go to Menu > User Mgt. > All Users.
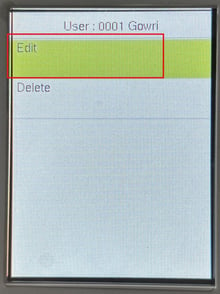
- Select the employee, then Edit.
- Set User Role to Super Admin.
- Register their face or fingerprint (see Register Employees' Face and Fingerprint on the TimeTec TC10), so they can open the menu.
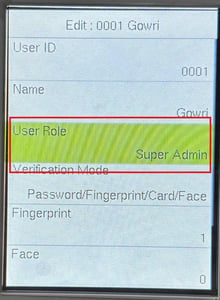
Once a Super Admin exists, the device menu is locked to everyone else. Only Super Admins can open it, by scanning their face or fingerprint.
Important: Don't add employees on the device. BrioHR syncs them automatically. Employees added manually get a different ID, which creates duplicate profiles and failed clockings. If any were added, delete them.
Step 7 (Full Action Log only): Set up the Check-In and Check-Out keys
Without this step, the device sends no action type and every clocking fails with Invalid action type. Skip it if you use First & Last Log.
- Go to Menu > Personalize > Punch State Options.
- Set Punch State Mode to Manual and Auto Mode.
- Go to Personalize > Shortcut Key Mappings and set:
| Key | Punch State Value | Function | Name |
|---|---|---|---|
| Up | 0 | Punch State Options | Check-In |
| Down | 1 | Punch State Options | Check-Out |
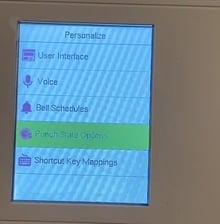
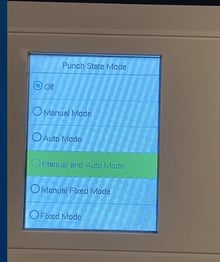
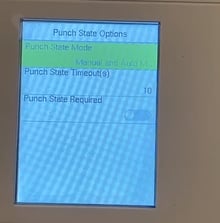
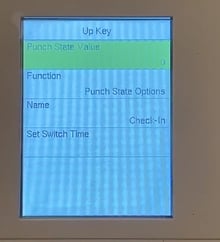
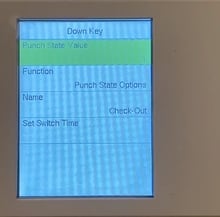
Employees then press Up for Check-In or Down for Check-Out before scanning.
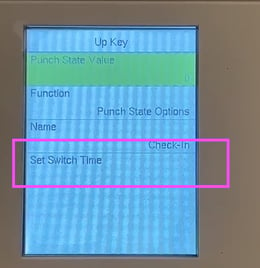
Tip: switch automatically by time. In each key mapping, use Set Switch Time so the device changes action by itself, for example Check-In from 8:00 AM and Check-Out from 4:00 PM. Employees can still press the arrows to change it. This prevents most "Consecutive clock ins not allowed" errors.
Step 8 (all modes): Stop accidental double scans
The device scans quickly, so one person can be recorded twice within seconds. With break tracking, a double scan can look like a break that never ended.
- Go to Menu > System > Attendance > Duplicate Punch Period.
- Choose 1–4 minutes, or select User Defined and enter a value, for example 5.
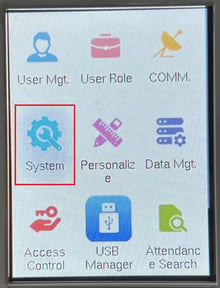
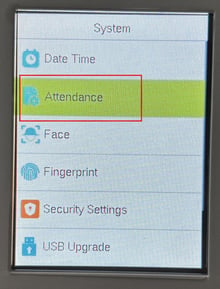
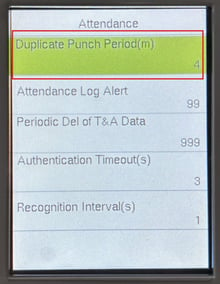
A second scan within that period shows a duplicate punch message and isn't recorded.
Next: Register Employees' Face and Fingerprint on the TimeTec TC10