![brioHR-logo-color.svg]](https://support.briohr.com/hubfs/brioHR-logo-color.svg)
Audience & Scope
Audience: HR Admin
Module: Document Management
Country: Global
Pre-requisites: Access to Document Management module in HR Lounge enabled
Before getting started with the Document Management configuration, please ensure that the module permission has first been enabled for the relevant users.
You may refer to this article before proceeding with the configuration below.
To help you get started with the Document Management configuration, you may choose between two guidance options:
1) a video walkthrough for a quick visual overview
2) step-by-step guide complete with screenshots for easier navigation and reference.
Video Guide on Setting Up the Document Management module
Video Guide to Enable the Document Workflow feature
Refer to this article for the step by step guide on this feature!
Step-by-Step Instructions on Document Management module
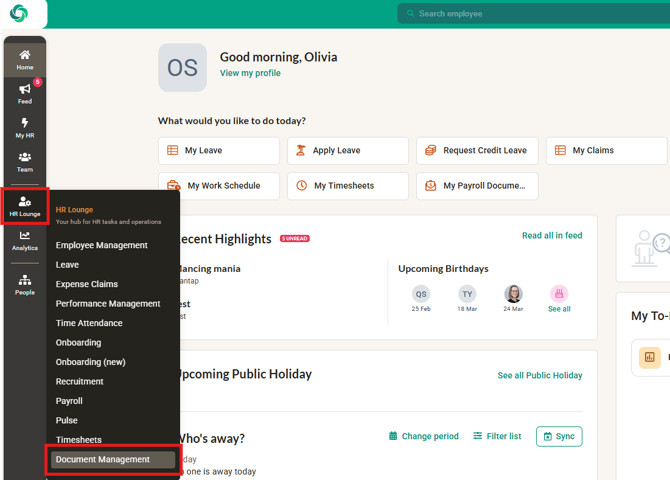
1. Log into brioHR and hover over HR Lounge then click into the Document Management module
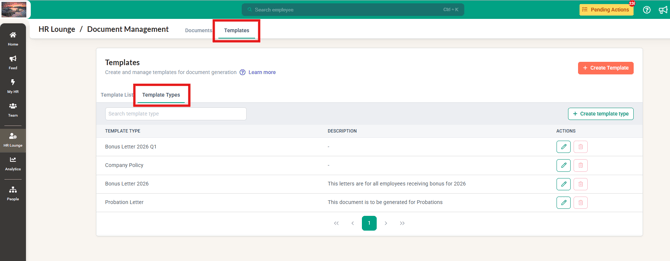
2. Click into the Templates tab and then into the Template types
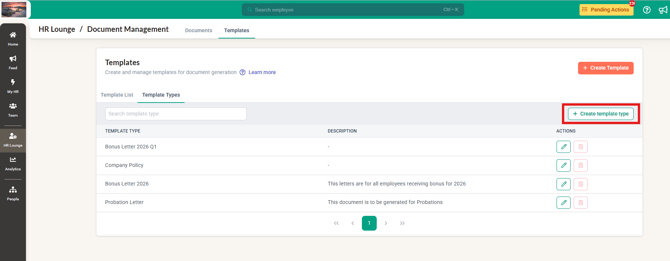
3. Click on the +Create template type button
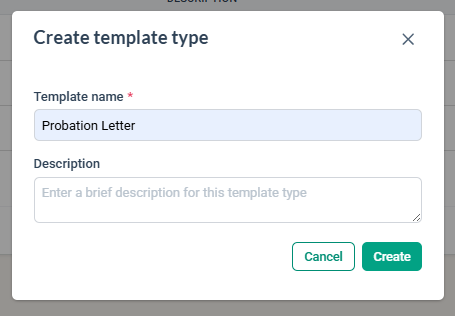
4. Fill in the details below and then click on Create
a. Template Name
b. Description
5. The template type has now been created and can be edited or removed if required.
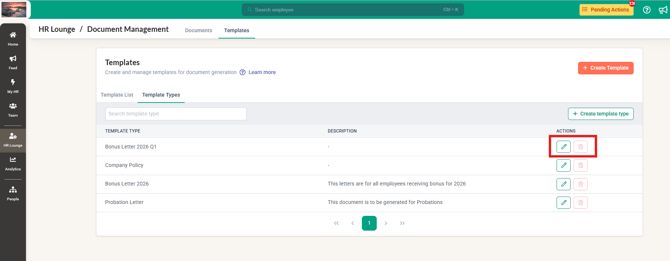
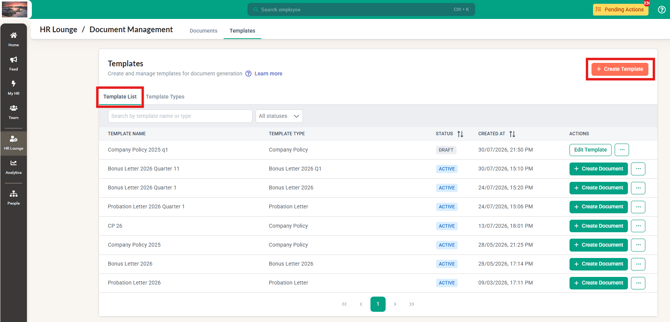
6. Next, click into the Template List and then click on + Create Template
7. Fill in the required information such as the Template Name, Template type, description, then choose to enable the Document Workflow if required, then click Continue to editor
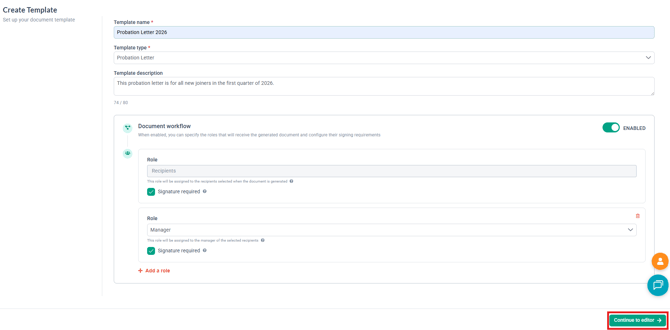
Read more about the Document Workflow feature here.
8. Here you will be able to configure the Layout of your template as well as the Fields required
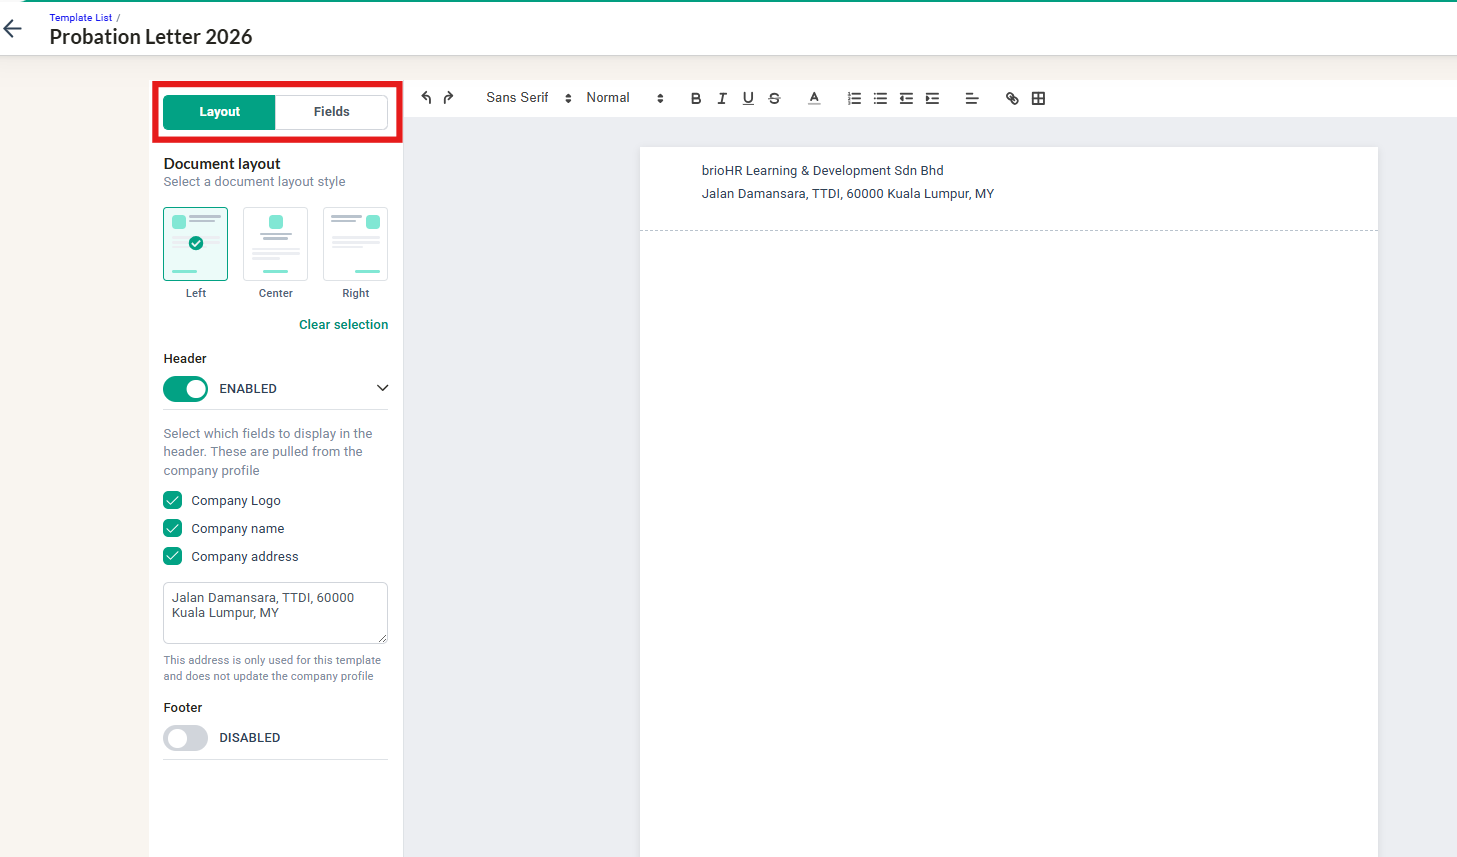
9. At the Layout tab, choose the style of the document, header and footer settings to be captured
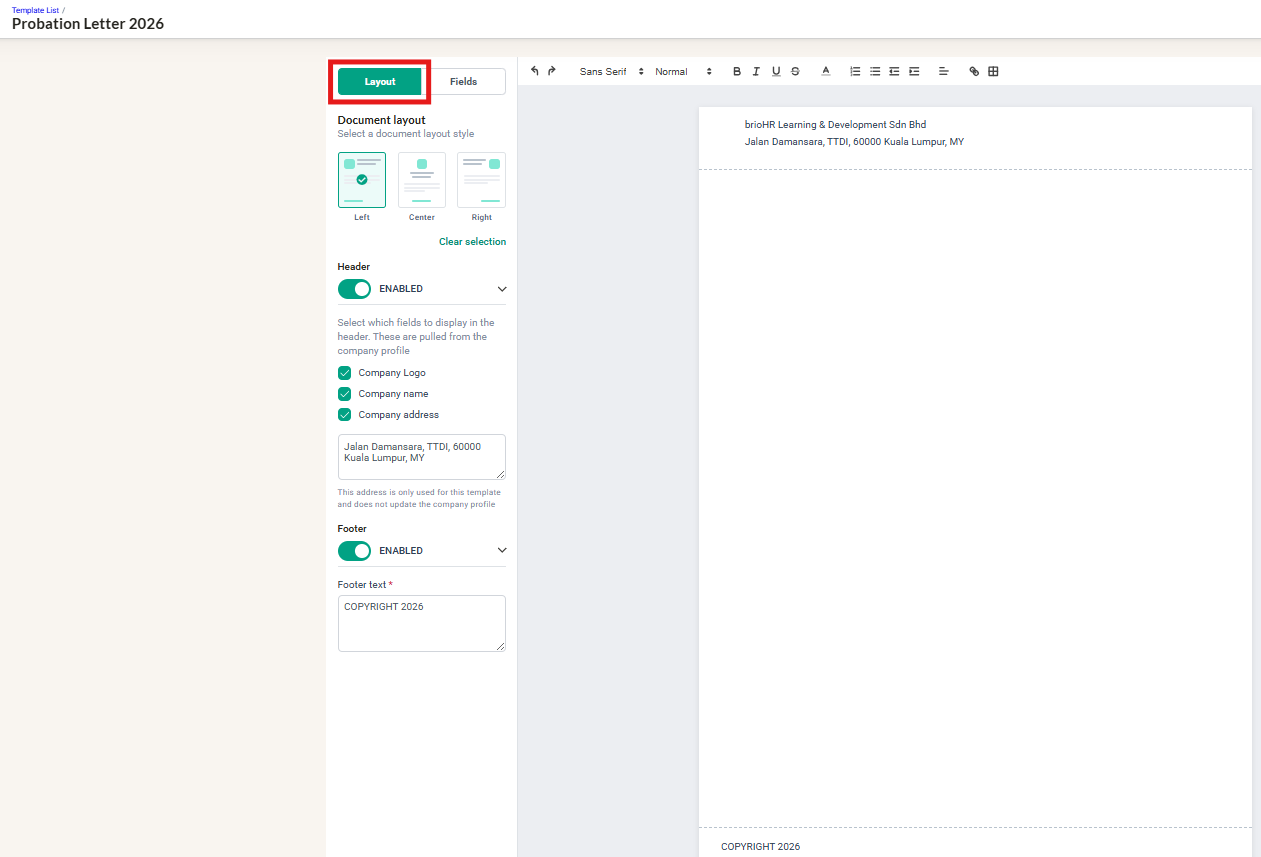
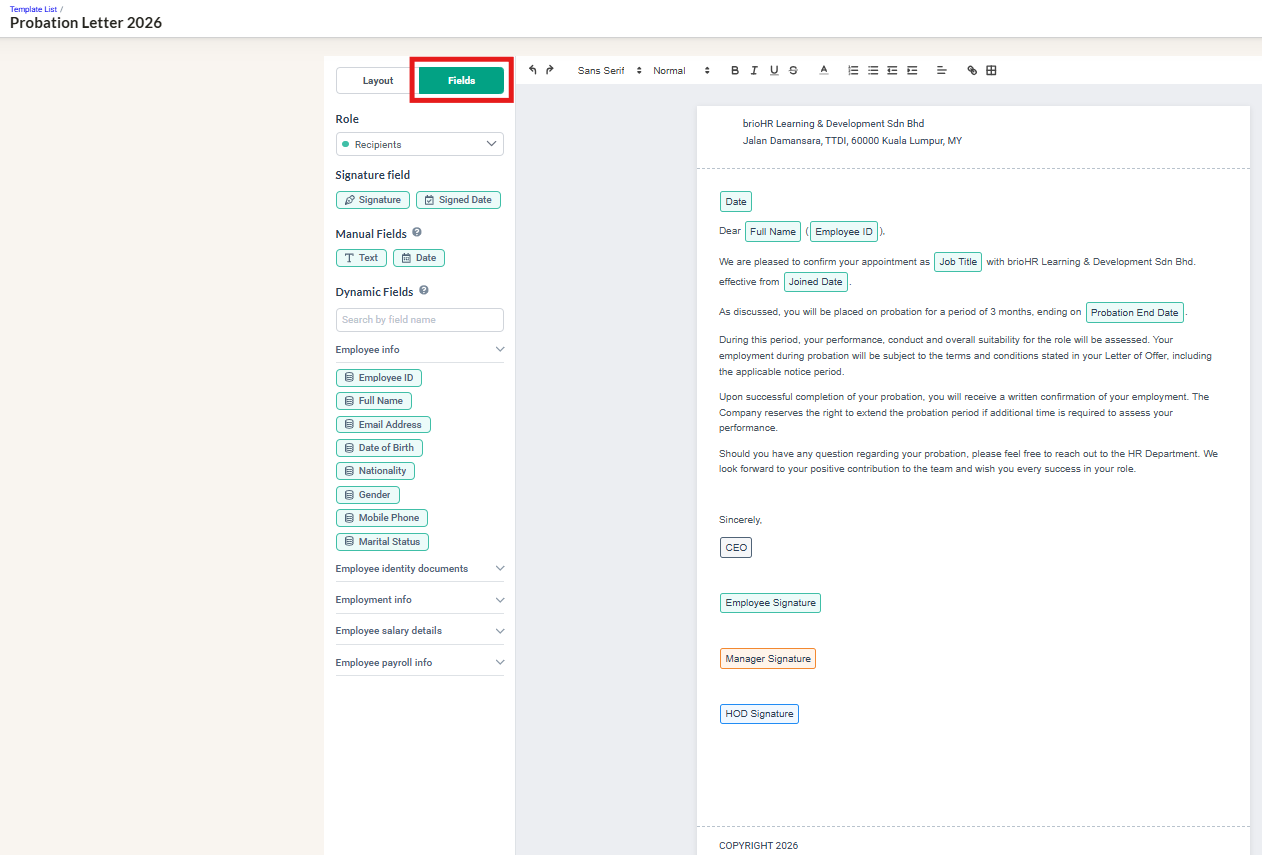
10. Next, click into the Fields, and draft out the content using the Manual and Dynamic Fields.
NOTE:
Manual Fields are fields of information which are placed within the template while drafting stage but will need to be manually filled in when the document is generated however, Dynamic fields are fields of information which will be automatically pulled from the system based on the available information at the employees profile.
TIP:
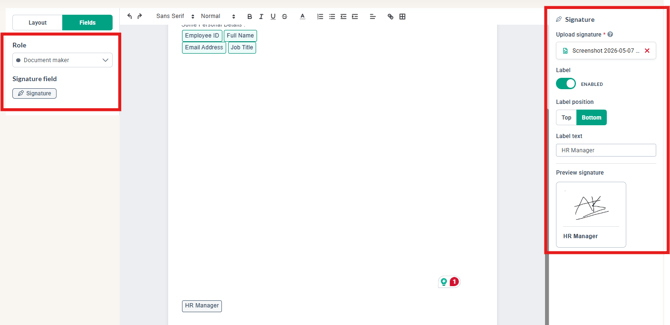
At the Role field, you will be able to choose the Document maker option to include a signature into the document generated.
Once you include the Signature, you will be able to upload a copy of the signature along with the Label. This can be customized to your preference!
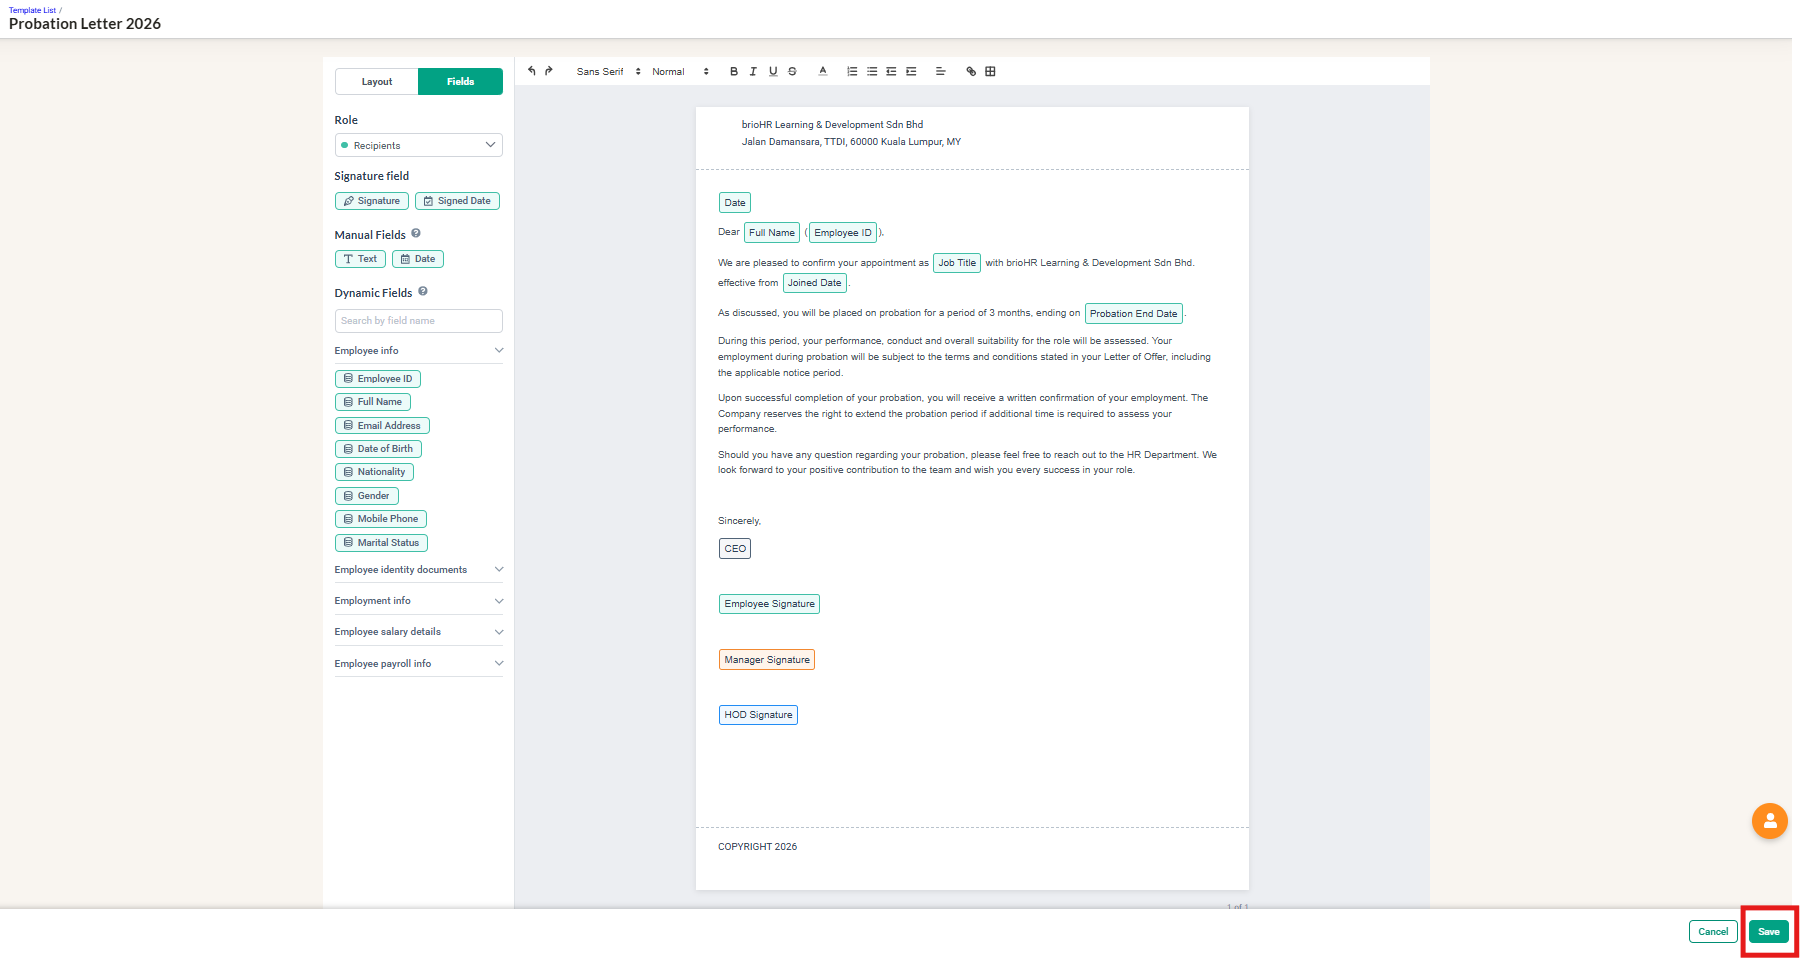
11. Once the template is prepared, click on Save
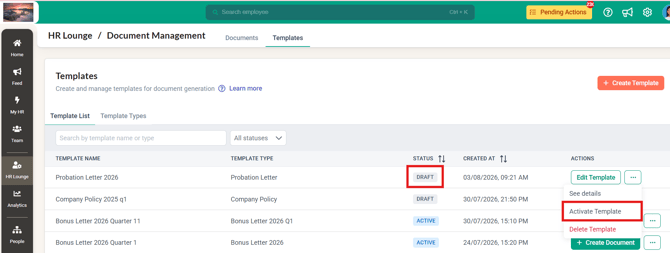
12. By default the template will be in the Draft stage, therefore click on the three dot icon to Activate template
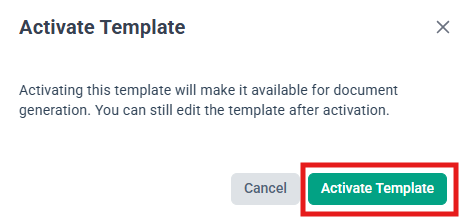
13. A pop up notification will appear, click on Activate Template here
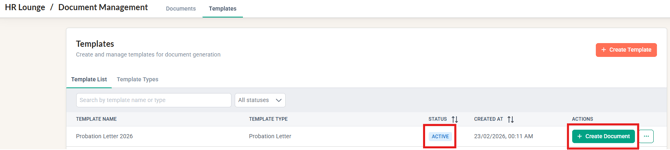
14. The Template now shows an Active status therefore, next step would be to Create Document
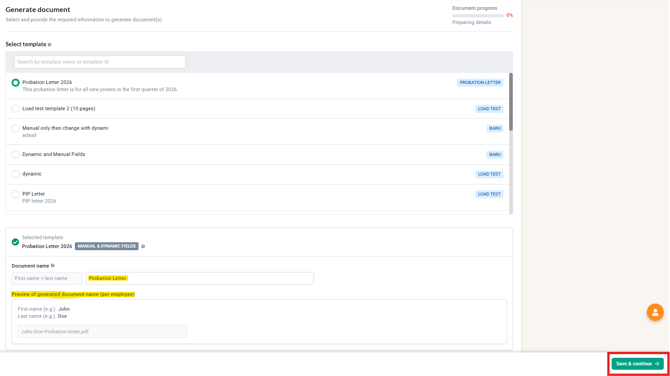
15. Select the template and also fill in the necessary information requested. You will be able to see a preview of the generated document title, proceed to click on Save & Continue
16. Select the Recipient folder in which the document will be stored in and then click Save & Continue
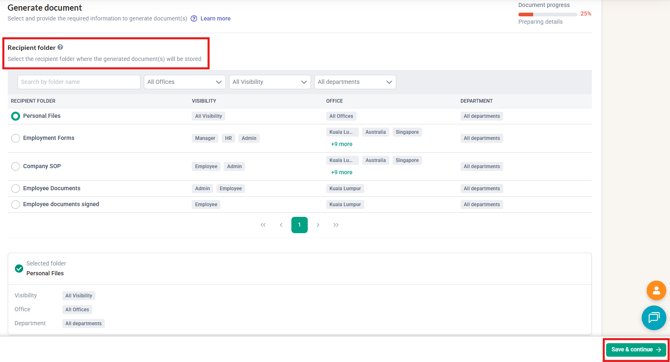
TIP ON VISIBILITY COLUMN:
If your document requires a recipient's signature, make sure the selected recipient folder has Employee visibility enabled.
If Employee visibility is disabled, you won't be able to save the document. Instead, you'll receive a warning prompting you to either enable Employee visibility for the folder in Company Settings or choose a different recipient folder. 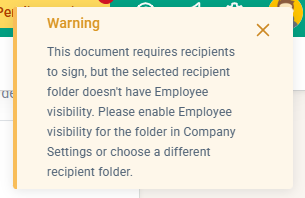
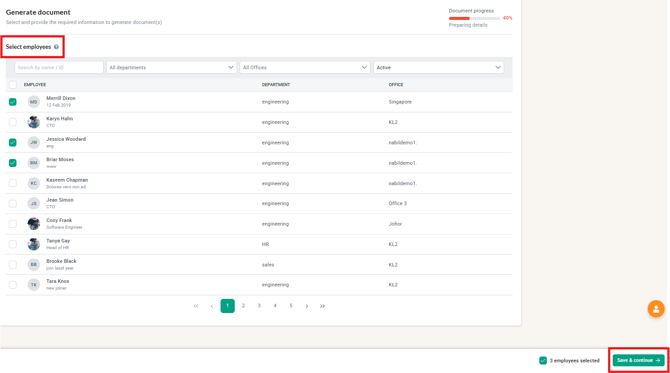
17. Select the employees which require this document to be generated for and then click Save & Continue
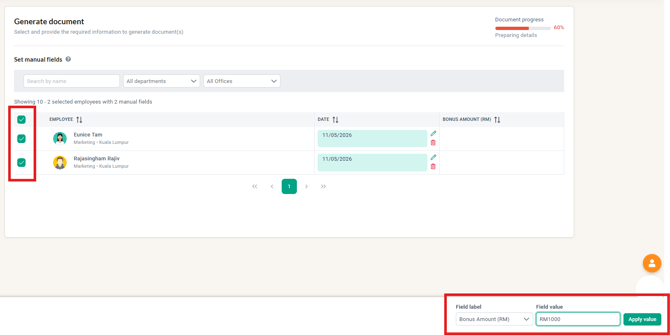
18. Fill in the information for the manual fields and then click Save & Continue
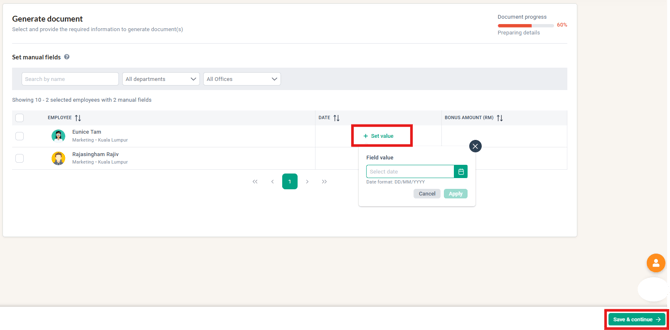
TIP:
The Manual Fields can be filled in by bulk for the employees selected by clicking on the checkbox and then filling in the information required.
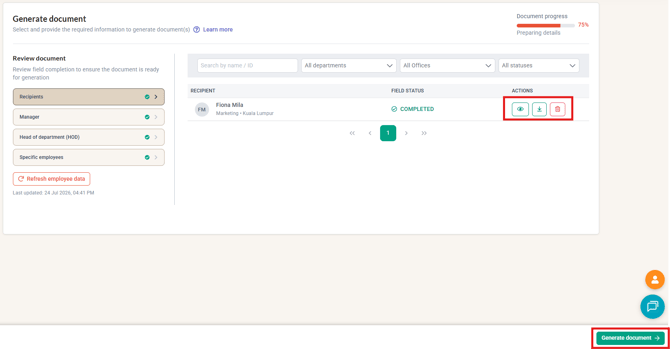
19. You can then view details of the document, download a copy of the document as well as delete the document if required. Once all information is accurate, click Generate Document
In the event that employees information has been updated, you will be able to click on the Refresh employee data button here to capture the latest information. 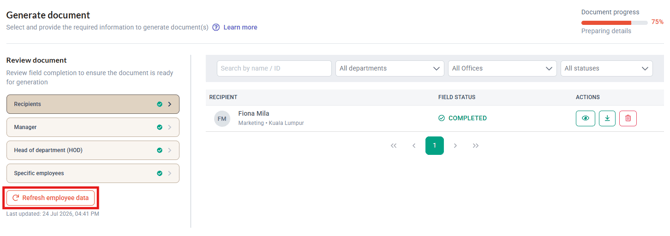
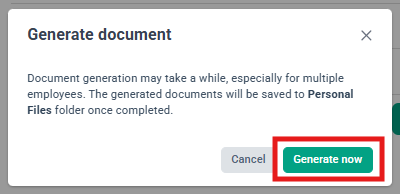
20. Click on the Generate now button to generate the documents accordingly. These documents will be saved at the Employee Profile > Document tab.
21. The documents are now being generated and will show with the In Progress status. You may click into the See Details button for updates.

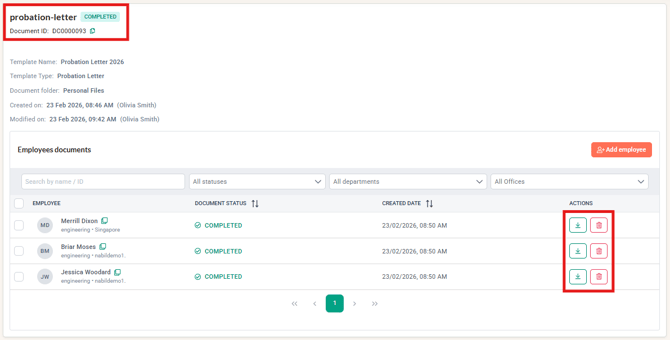
22. Once the documents have been successfully generated, it will show with the completed status. You will be able to download a copy of the document as well as delete the document if no longer required.
If the Document Workflow feature is enabled, the status of the documents will be 'Pending'. Once all the signatures have been obtained, then the document will show the 'Completed' status.
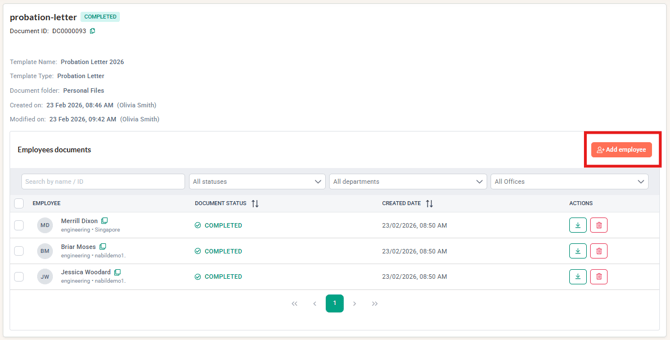
22. In the event, there are additional employees need to be included so that the document can be generated for them, you can Add employees into the list here too
IMPORTANT:
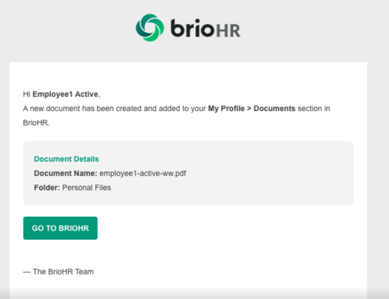
Once the document generated shows the Completed status, an email notification will be automatically sent out to the employee to inform them accordingly.
Sample email is shared in the screenshot below:
23. A sample of the generated document is shared below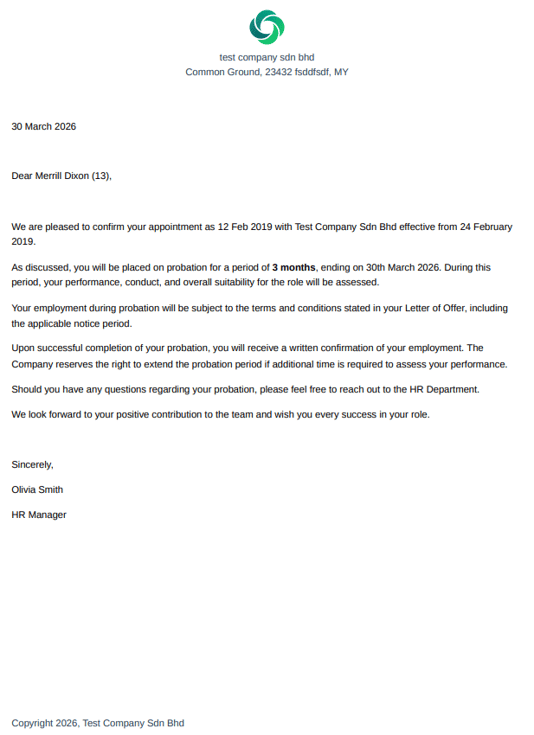
Related Articles
1. Document Management Configuration for User Permissions
2. Frequently Asked Questions for Document Management
3. How to Create Custom Document Folders for BrioHR Employee Profiles
4. Employee Personal Files in BrioHR: How to Upload, Manage and Access Documents
5. How to Use the Document Workflow feature in Document Management
Ownership
By: Arveena