Before opening the Time Attendance module to all employees and managers, ensure that they have been assigned to the correct Time Attendance policies and that the policies have been set up correctly.
In this article, we will learn how to:
- Create a new time attendance policy
- Set up policy eligibility (either make it available to all employees or restrict it based on criteria)
- Set up a policy supervisor and approval process
- Set up policy rounding calculations (for overtime, lateness, and early out rounding)
- Configure other policy settings (geolocation clock in : Following shift location and/or following custom location)
NOTE:
- If you would like to know how to create new work shifts, please refer to [this guide].
- If you would like to know how to create work schedules for work pattern Full Week and Custom, please refer to [this guide] and [this guide].
To Access the Time Attendance Policy:
Login to your BrioHR account.
1. Navigate to the HR Lounge > Time Attendance module.
2. Click on the Policy tab

-
- Create a new time attendance policy : Click the +Create policy button.
- Assign policy to an employee: Click the Assign policy button.
-
- Eligibility
- Supervisor & Approval
- Rounding Calculation
- Other configuration (including geolocation clock-in)


a) Eligibility
Assign the policy eligibility by choosing one of the following:
- Eligible to all employees: This option allows the policy to be assigned to every employee in the company.
- Only eligible to certain groups of employees: This option restricts policy availability to employees who meet the defined criteria (e.g., employees in the Engineering department).
IMPORTANT:
If you choose "only eligible to certain groups of employees" for this policy, make sure to Assign Policy to the relevant employees.

b) Supervisor & Approval
Choose the person or role responsible for managing employees assigned to this policy.
There are 2 options:
- Position: Choose 'Manager'
- Specific Employee: Select a specific individual. Overtime approval requests will be routed to this person instead of the employee’s reporting manager.

c) Rounding & Calculation
You can configure rounding for 3 time categories:
i) Overtime rounding
Choose if the overtime should round up or round down to the nearest minutes internal.
ii) Lateness rounding
Choose if the lateness should round up or round down to the nearest minutes internal.
iii) Early out rounding
Choose if the early out should round up or round down to the nearest minutes interval.
As for the rounding options:
- Follow default policy: Uses the rounding settings from the default policy
- Do not round: Disables rounding.
- Round overtime: Choose 'Round down to the nearest', or 'Round up to the nearest'.


c) Other Configuration
i - Geolocation
- When enabled, employee's clock in and out locations will be restricted.
- For step-by-step instructions, especially on enabling geofencing, refer to [How to enable multi-geolocation]
- If 'Restrict Clock-in Location' is disabled, the system will not restrict the location but will still record the employee's location during clock in and out.

ii - Facial Recognition
- When enabled, employees must verify their identity using facial recognition every time they clock in or out.

iii - Notifications: Send Overtime Email Notifications
- When enabled, managers will receive email notifications whenever an employee's overtime is calculated and requires approval.
- Disabling this setting stops email notifications from being sent out. However, it does not stop tasks to approve Overtime from appearing in the Pending Actions.

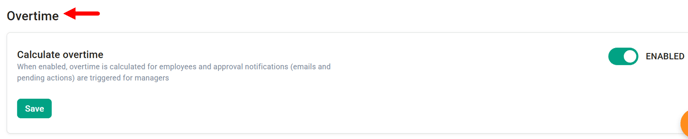
iv - Overtime: Calculate Overtime
- When enabled, overtime is calculated for employees and approval notifications (email + pending actions) are triggered for managers.
- When disabled, the system does not calculate overtime for that day.
- As a result, no overtime notifications or pending tasks will appear, and any extra hours worked beyond the standard schedule will not be recorded as overtime in the employee’s timesheet.
Need Assistance?
If you have any questions or require assistance, please reach out to our support team via live chat or email us at support@briohr.com.