![brioHR-logo-color.svg]](https://support.briohr.com/hubfs/brioHR-logo-color.svg)
Audience & Scope
Audience: HR Admin
Module: Core HR - Employee Management
Country: Global
Pre-requisites: User Group permission:
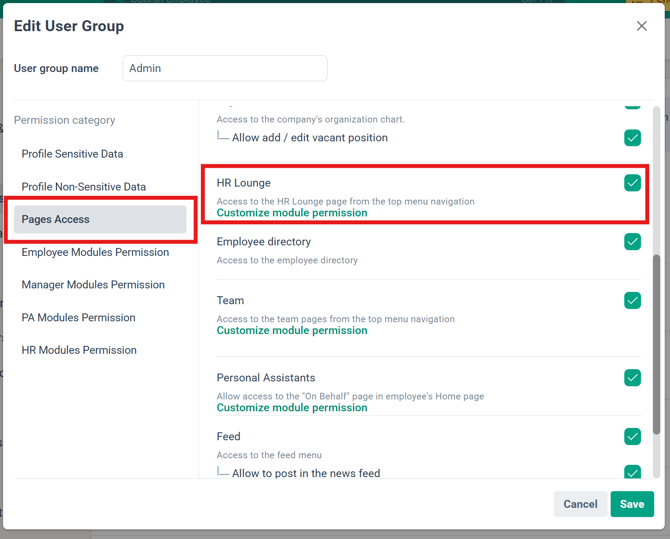
- Page Access > HR Lounge
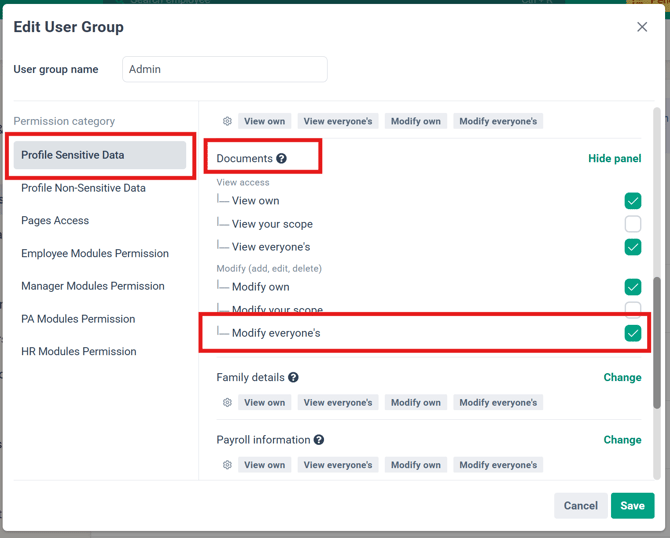
- Profile Sensitive Data > Documents > set to Modify Everyone's
IMPORTANT: brioHR reads the Employee ID in each file name to match the file to the right employee. You review every match before anything is saved, so no file reaches a profile until you confirm.
Before You Start
1. Check your permissions
You need both of these. Without them, the Documents option does not appear in Bulk Import/Export.
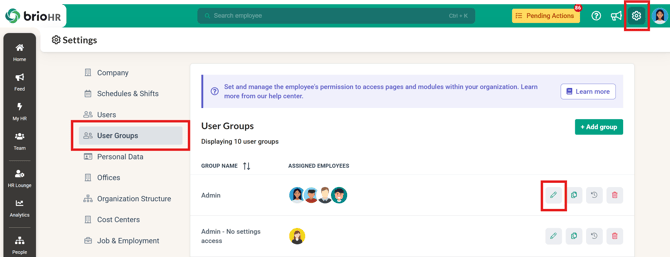
- Access to HR Lounge — go to Settings > User Groups, edit the user group, then open Pages Access > HR Lounge.
- Access to Documents > Modify Everyone's — go to Settings > User Groups, edit the user group, then open Profile Sensitive Data > Documents.
2. Name your files
- Include one Employee ID in each file name, for example
EMP001_Payslip_Jan.pdf. - You can upload several files for the same employee, for example
EMP001_Payslip_Jan.pdfandEMP001_Payslip_Feb.pdf. - If an Employee ID contains a character that can't be used in a file name, such as
#, replace it with a space. For example, for Employee IDBRIOHR#1001, name the fileBRIOHR 1001_Payslip.pdf. - Upper or lower case doesn't matter:
briohr 1001_Payslip.pdfstill matches.
3. Check the limits
|
Limit |
Value |
|---|---|
|
Files per upload |
Up to 100 files |
|
File size |
Up to 10 MB per file |
|
File types |
PDF, DOC, DOCX, JPG, JPEG, PNG |
|
NOT allowed |
ZIP files and whole folders |
|
Folders per upload |
One folder |
NOTE:
Have more than 100 files? Split them into batches of 100 and run the upload once per batch.
Step-by-Step Guide: Bulk Upload Files
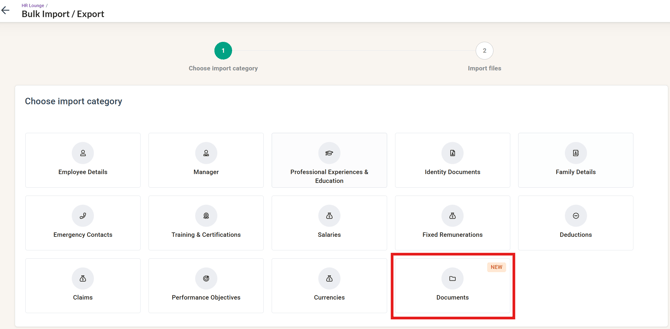
Step 1 - Open Bulk Import/Export
- Go to HR Lounge > Employee Management > Bulk Import/Export.
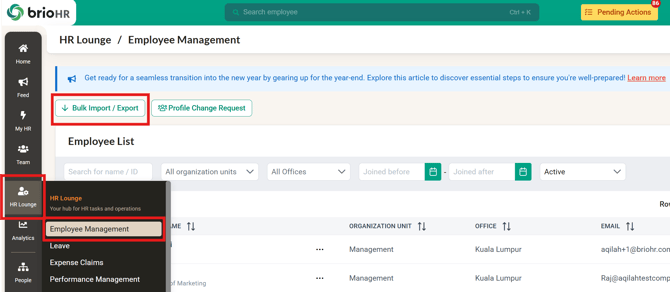
- Click Documents.
Step 2 - Choose a folder
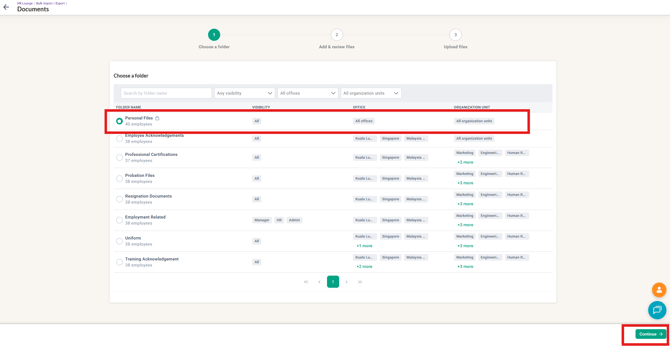
The page shows three steps: Choose a folder, Add & review files, and Upload files.
- Find the folder you want to upload to. The list shows every profile folder, including Personal Files and your custom folders, with:
- Folder name and the number of recipients (employees the folder is assigned to)
- Visibility, Office and Organization unit
- Use Search folder name or the Office, Visibility and Organization unit filters to narrow the list.
- Select the folder with its radio button. You can choose only one folder per upload.
- Click Continue.
NOTE: A file can only go to an employee the folder is assigned to. Personal Files is available for every employee.
Step 3 - Add your files
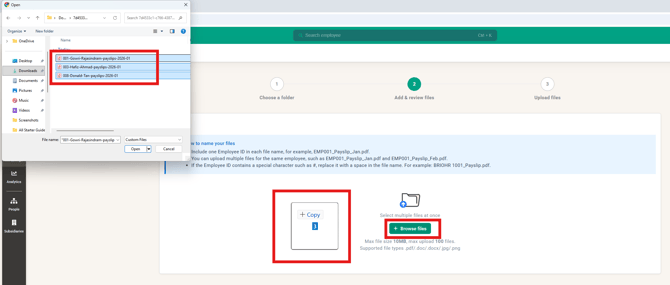
- Click +Browse files and select the files from your computer. You can select many at once, or drag and drop them onto the page.
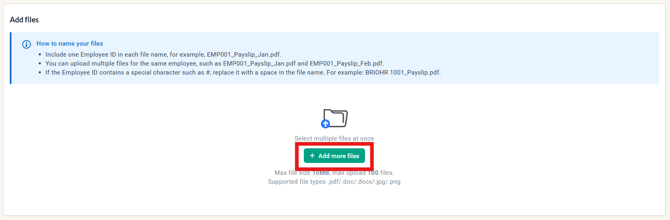
- Need more? Click Add more files. New files are added to the list and the files already there stay.
Files are checked as you add them:
- Files over 10 MB, or in a format that isn't supported, are not added. brioHR shows which files weren't added and why.
- If the list would go over 100 files, the whole selection is blocked.
- Files with the same name as one already in the list are skipped, and you'll see: "Some files are already in the list and weren't added."
Step 4 - Review the matches
Each file is listed with its File name, Employee ID, Employee name and Status:
- Matched — the file is matched to one employee and is ready to upload.
- Needs attention — brioHR couldn't match the file. These rows are listed first.
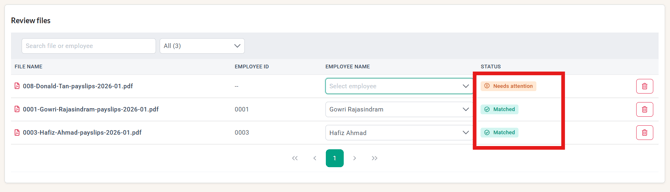
A file shows Needs attention when its name has:
- No Employee ID, or more than one Employee ID
- An Employee ID that doesn't exist in the company, or that more than one employee shares
- An Employee ID for an employee the folder isn't assigned to
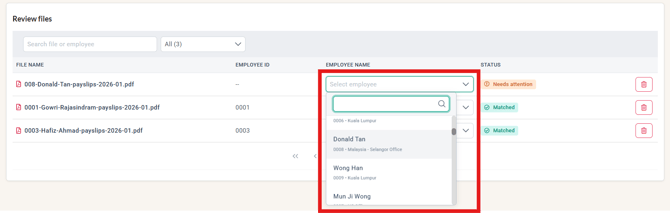
To fix a row that needs attention, do one of the following:
- Select employee: pick the right employee from the dropdown. Only employees who have the selected folder are listed, including resigned employees (marked INACTIVE). The row changes to Matched.
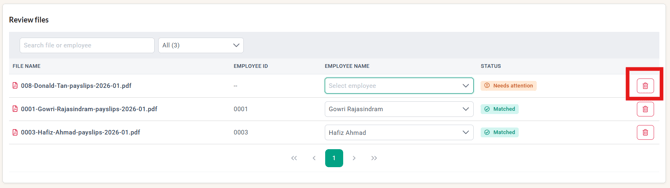
- Remove the file: click the bin icon. The row is removed straight away
Useful tools on this step:
- Filter by All, Needs attention or Matched, or search by file name, employee name or Employee ID.
- Click a file name to download it and check its content before uploading.
IMPORTANT: Nothing is saved to any profile at this step. The Upload files button stays disabled until every row is Matched.
NOTE: Clicking Back keeps your files. If you then choose a different folder, brioHR asks you to confirm, because changing the folder removes all the files you added.
Step 5 - Confirm and upload
- Click Upload files.
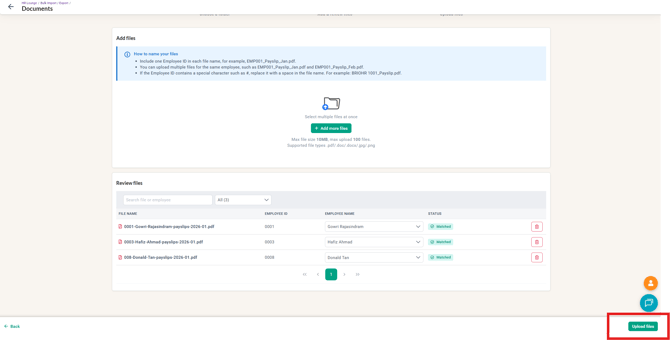
- Check the Confirm File Upload message, for example: "25 file(s) will be uploaded to Payslips for 20 employee(s)."
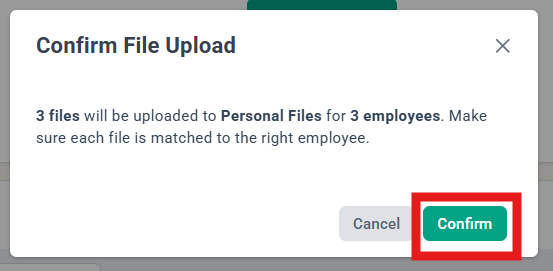
- Click Confirm.
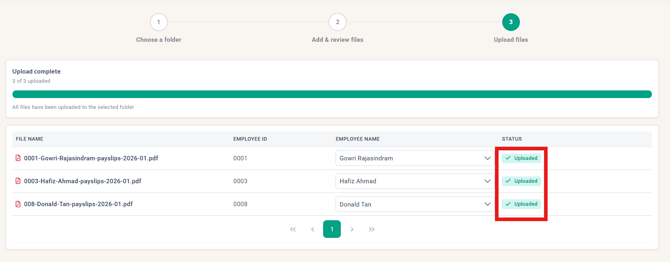
The files upload one at a time. A progress bar shows how many are done, and each row's status changes from Waiting to Uploading to Uploaded.
IMPORTANT:
- Keep the brioHR tab open and stay logged in until the upload is complete.
- You can move to other pages in brioHR while files upload. When you come back to Bulk Import/Export > Documents, the progress is still shown.
- Refreshing or closing the tab, or logging out, stops the upload. Files already marked Uploaded stay in the employees' profiles; add the rest again in a new upload.
- Only one upload can run at a time in your company. If another admin is already running an import, you'll see "Another import is in progress".
Step 6 - Check the result
When every file is uploaded, the page shows Upload complete. Each file is now in the selected folder in the employee's Profile > Documents.
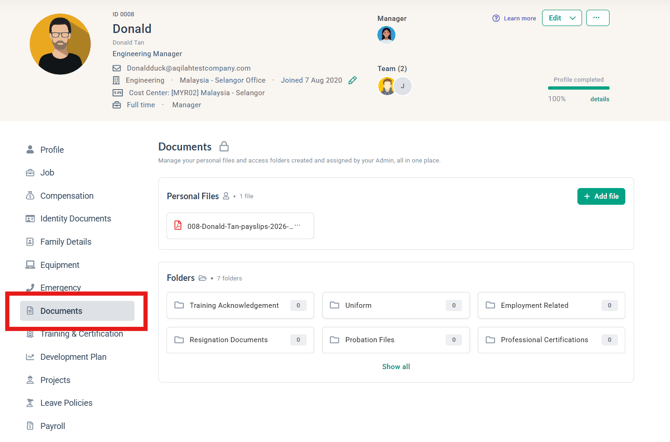
If some files failed: failed rows show a Failed status. Click Retry upload to upload only the failed files again. Repeat until every file shows Uploaded.
NOTE: Who can see an uploaded file follows the folder's own visibility settings. For example, files uploaded to a folder that is hidden from employees (such as Warning Letters) are saved to the profile, but the employee won't see them.
Frequently Asked Questions (FAQs)
1. Can I upload a ZIP file or a whole folder?
No. Select the individual files instead. You can select up to 100 at once.
2. Can I upload files to several folders at once?
No. Each upload goes to one folder. Run a separate upload for each folder.
3. Can I upload files for resigned employees?
Yes. Files are matched to resigned employees too, and you can pick them in the Select employee list.
4. I have more than 100 files. What should I do?
Split them into batches of up to 100 files and upload each batch separately.
5. What happens if I close the tab during an upload?
The upload stops. Files already marked Uploaded stay in the profiles. Start a new upload for the remaining files.
6. Why can't I see the Documents option in Bulk Import/Export?
You need both HR Lounge access and the Documents > Modify Everyone's permission. Ask your administrator to check your user group under Settings > User Groups > Profile Sensitive Data > Documents.
7. Can employees bulk upload their own files?
No. Bulk upload is for admins with the permissions above. Employees can still add files to their own Personal Files one at a time, if permitted.
Related Articles
- Employee Personal Files in brioHR: How to Upload, Manage and Access Documents
- Bulk and Mass Updates in brioHR: What You Can Do in Bulk, and Where
Ownership
By: Aqilah