![brioHR-logo-color.svg]](https://support.briohr.com/hubfs/brioHR-logo-color.svg)
Audience & Scope
Audience: HR and admin teams setting up brioHR for the first time
Module: Profile & Dashboards
Country: Malaysia, Singapore
Pre-requisites: Implementation kick-off meeting with your Implementation Manager (IM) completed; Profile & Dashboards data migrated by your IM
This article is part of the Profile & Dashboards data verification series. It follows the Profile & Dashboards Data Verification Guide (PDF).
Step 6: Check user groups and access
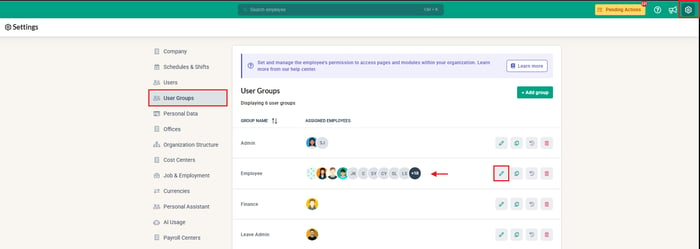
- Go to Settings > User Groups and review the module access for each group.
- Confirm each employee is in the right group.
- Confirm Admin user groups only have access to the modules and information that role needs, and only the right people are in them. Admins can see company-wide and sensitive information, so wider access than intended is a privacy risk.
- Ask one pilot user per role (HR, Manager, Employee) to log in and confirm what they can and cannot see.
Click the pencil icon to check the permissions of each user group
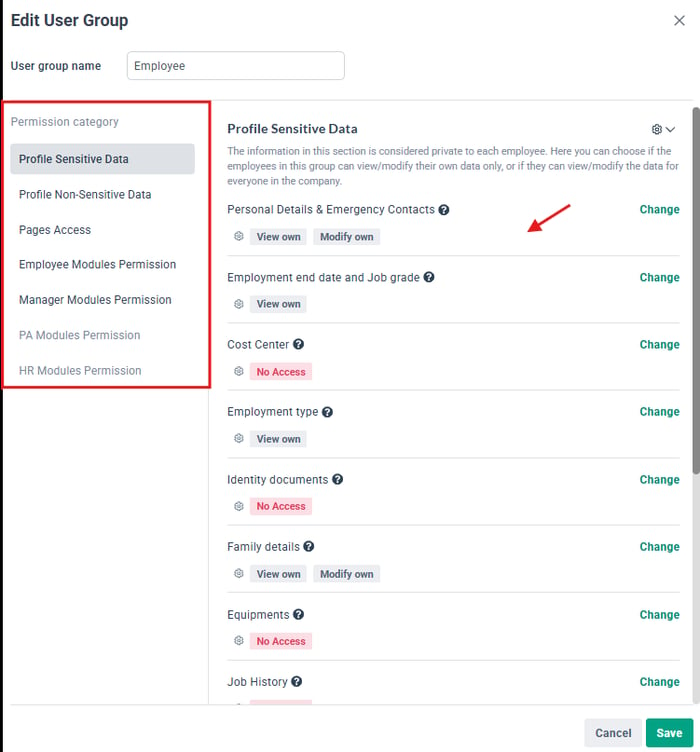
Example: go through each permissions category and make sure the permissions are accurate
🔗 Related article
Step 7: Check your company address and logo
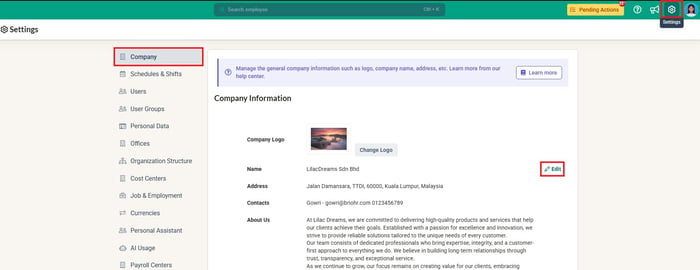
- Click the Settings icon at the top right, open the Company tab, and go to Company Information.
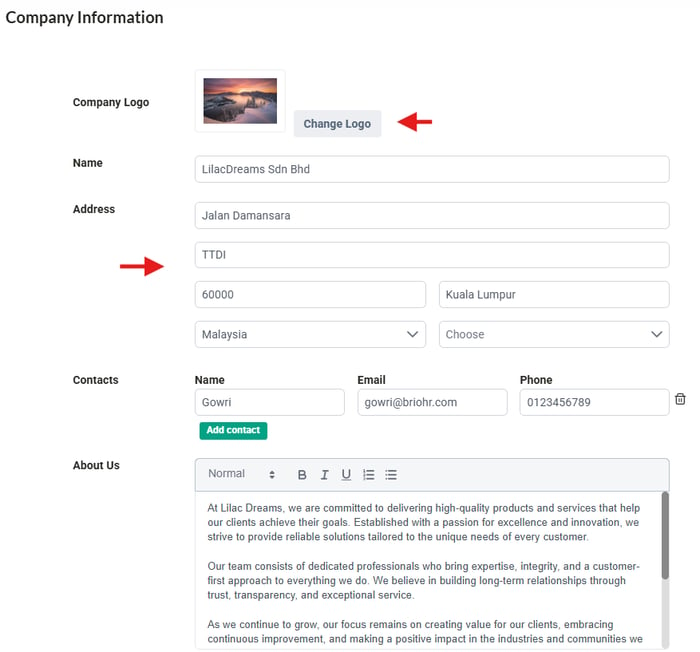
- Confirm the company address is complete and correct. To fix it, click the Edit icon, update the Address field and click Save.
- Confirm your company logo is uploaded. Use Set Logo (or Change Logo), choose the file, tick Use company logo and click Save.
- If you also use Payroll, the logo appears on payslips and the address on certain statutory forms (for example the Singapore IR8A).
Click into Settings > Company > Company Information
Set or change the logo, tick Use company logo, then click Save
Step 8: Set up Profile Change Request (if employees can edit their details)
Only needed if employees may update their own details (for example address, phone number or marital status) and every change must be approved by HR first. If employees cannot edit their own details, skip this step.
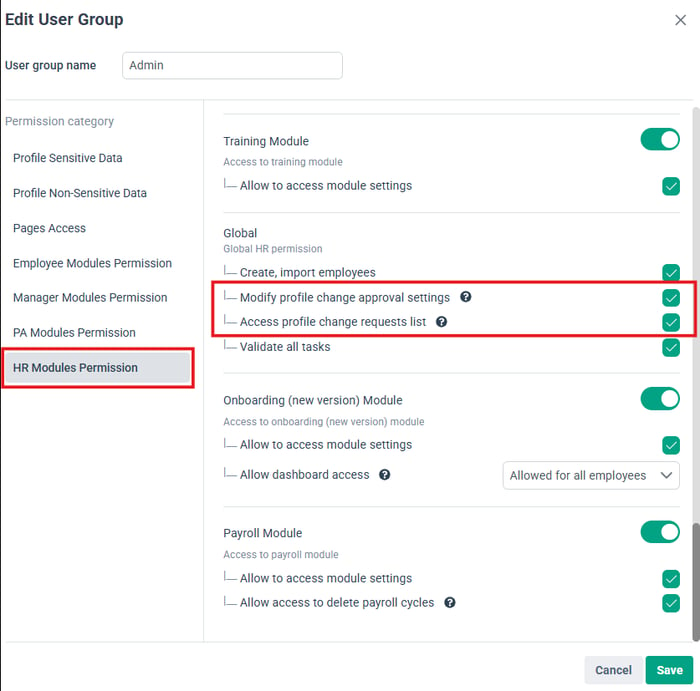
- Confirm Profile Change Request is enabled in the Admin user group, on the Settings page (the gear icon at the top right).
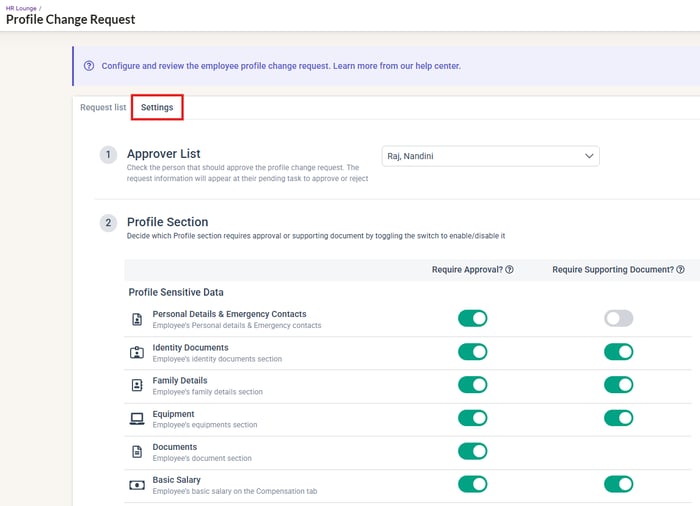
- Open Profile Change Request > Settings. For each profile section, decide whether changes require approval and whether employees must attach supporting documents.
- Assign approvers under HR Lounge > Employee Management > Profile Change Request. Only assigned approvers can approve; you can assign more than one, and one approval is enough.
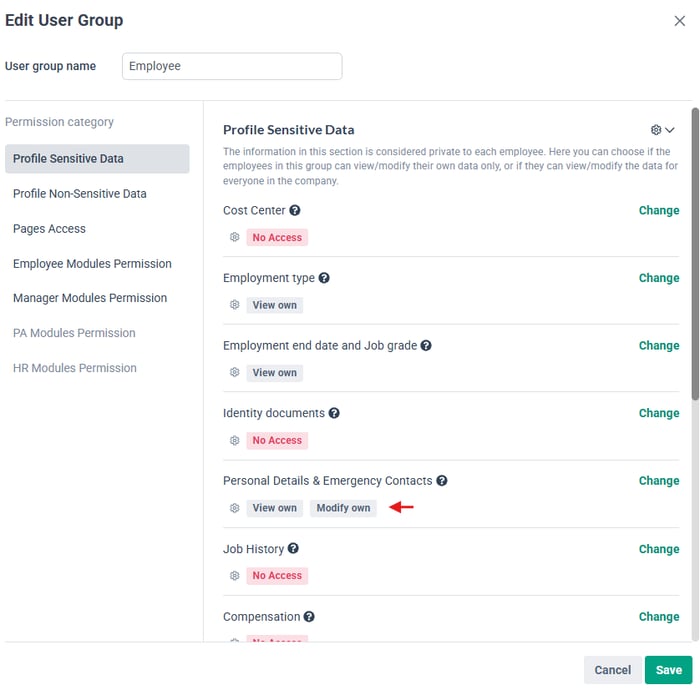
- In Settings > User Groups, turn on View Own and Modify Own for the profile sections employees may edit (under the sensitive and non-sensitive profile data permissions), and leave them off for the rest.
- Test it: ask a pilot employee to submit a small change. Confirm the approver is notified (by email and task), approve it, and check that the profile updates.
Profile Change Request enabled in the Admin user group
Profile Change Request > Settings: approval and supporting documents per section
Settings > User Groups: View Own and Modify Own per profile section
💡 Tip
Open edit access after Profile Change Request is set up, not before. That way every change goes through HR approval.
🔗 Related article
Step 9: Send activation emails (before Go-Live)
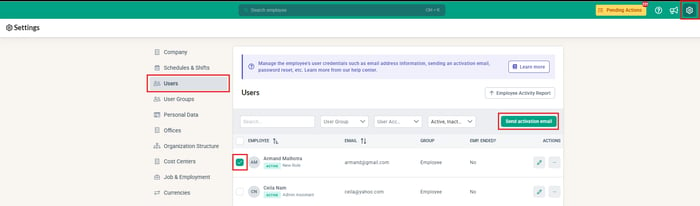
- Once you are happy with the data, go to Settings > Users, select the employee and click Send Activation.
- Employees use their email address as their login ID, so correct any wrong email first.
Click into Settings > Users, select the employee, then click Send Activation
💡 Tip
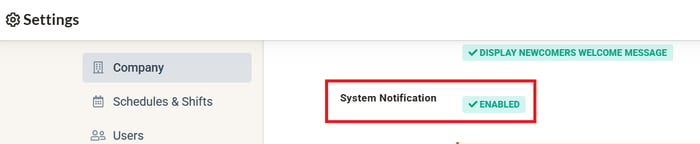
Check that System Notifications is enabled in the Company Settings before you send activation emails.
🔗 Related articles
← Previous: How to Verify Your Profile & Dashboards Data: Offices, Headcount, Profiles and Reporting Lines
Next: Profile & Dashboards Data: What to Look Out For and What to Do If Something Doesn't Match →
Back to Profile & Dashboards Data Migration and Verification: Start Here
Ownership
By: Aqilah